SpringBoot监听机制-以及使用
11-SpringBoot事件监听
Java中的事件监听机制定义了以下几个角色:
①事件:Event,继承 java.util.EventObject 类的对象
②事件源:Source ,任意对象Object
③监听器:Listener,实现 java.util.EventListener 接口 的对象
SpringBoot 在项目启动时,会对几个监听器进行回调,我们可以实现这些监听器接口,在项目启动时完成一些操作。
-
ApplicationContextInitializer、
-
SpringApplicationRunListener、
-
CommandLineRunner、
-
ApplicationRunner
自定义监听器的启动时机:MyApplicationRunner和MyCommandLineRunner都是当项目启动后执行,使用@Component放入容器即可使用
yApplicationRunner
/*** 当项目启动后执行run方法。* 缓存数据*/
@Component
public class MyApplicationRunner implements ApplicationRunner {@Overridepublic void run(ApplicationArguments args) throws Exception {System.out.println("ApplicationRunner...run");System.out.println(Arrays.asList(args.getSourceArgs()));}
}
MyCommandLineRunner
@Component
public class MyCommandLineRunner implements CommandLineRunner {@Overridepublic void run(String... args) throws Exception {System.out.println("CommandLineRunner...run");System.out.println(Arrays.asList(args));}
}
MyApplicationContextInitializer的使用要在resource文件夹下添加META-INF/spring.factories
org.springframework.context.ApplicationContextInitializer=com.itheima.springbootlistener.listener.MyApplicationContextInitializer
@Component
public class MyApplicationContextInitializer implements ApplicationContextInitializer {@Overridepublic void initialize(ConfigurableApplicationContext applicationContext) {System.out.println("ApplicationContextInitializer....initialize");}
}
MySpringApplicationRunListener的使用要添加构造器
public class MySpringApplicationRunListener implements SpringApplicationRunListener {public MySpringApplicationRunListener(SpringApplication application, String[] args) {}@Overridepublic void starting() {System.out.println("starting...项目启动中");}@Overridepublic void environmentPrepared(ConfigurableEnvironment environment) {System.out.println("environmentPrepared...环境对象开始准备");}@Overridepublic void contextPrepared(ConfigurableApplicationContext context) {System.out.println("contextPrepared...上下文对象开始准备");}@Overridepublic void contextLoaded(ConfigurableApplicationContext context) {System.out.println("contextLoaded...上下文对象开始加载");}@Overridepublic void started(ConfigurableApplicationContext context) {System.out.println("started...上下文对象加载完成");}@Overridepublic void running(ConfigurableApplicationContext context) {System.out.println("running...项目启动完成,开始运行");}@Overridepublic void failed(ConfigurableApplicationContext context, Throwable exception) {System.out.println("failed...项目启动失败");}
}
12-SpringBoot流程分析-初始化
-
配置启动引导类(判断是否有启动主类)
-
判断是否是Web环境
-
获取初始化类、监听器类

13-SpringBoot流程分析-run
-
启动计时器
-
执行监听器
-
准备环境
-
打印banner:可以resource下粘贴自定义的banner
-
创建context
refreshContext(context);执行refreshContext方法后才真正创建Bean

14-SpringBoot监控-actuator基本使用

①导入依赖坐标
org.springframework.boot spring-boot-starter-actuator ②访问http://localhost:8080/acruator
{"_links":{"self":{"href":"http://localhost:8080/actuator","templated":false},"health":{"href":"http://localhost:8080/actuator/health","templated":false},"health-component-instance":{"href":"http://localhost:8080/actuator/health/{component}/{instance}","templated":true},"health-component":{"href":"http://localhost:8080/actuator/health/{component}","templated":true},"info":{"href":"http://localhost:8080/actuator/info","templated":false}}
}
http://localhost:8080/actuator/info
在application.properties中配置
info.name=lucy
info.age=99
http://localhost:8080/actuator/health
开启健康检查详细信息
management.endpoint.health.show-details=always
{"status":"UP","details":{"diskSpace":{"status":"UP","details":{"total":159579508736,"free":13558104064,"threshold":10485760}},"redis":{"status":"UP","details":{"version":"2.4.5"}}}
}
15-SpringBoot监控-actuator开启所有endpoint
开启所有endpoint
在application.properties中配置:
management.endpoints.web.exposure.include=*
开启所有endpoint的返回结果:
{"_links":{"self":{"href":"http://localhost:8080/actuator","templated":false},"auditevents":{"href":"http://localhost:8080/actuator/auditevents","templated":false},"beans":{"href":"http://localhost:8080/actuator/beans","templated":false},"caches-cache":{"href":"http://localhost:8080/actuator/caches/{cache}","templated":true},"caches":{"href":"http://localhost:8080/actuator/caches","templated":false},"health-component-instance":{"href":"http://localhost:8080/actuator/health/{component}/{instance}","templated":true},"health":{"href":"http://localhost:8080/actuator/health","templated":false},"health-component":{"href":"http://localhost:8080/actuator/health/{component}","templated":true},"conditions":{"href":"http://localhost:8080/actuator/conditions","templated":false},"configprops":{"href":"http://localhost:8080/actuator/configprops","templated":false},"env":{"href":"http://localhost:8080/actuator/env","templated":false},"env-toMatch":{"href":"http://localhost:8080/actuator/env/{toMatch}","templated":true},"info":{"href":"http://localhost:8080/actuator/info","templated":false},"loggers":{"href":"http://localhost:8080/actuator/loggers","templated":false},"loggers-name":{"href":"http://localhost:8080/actuator/loggers/{name}","templated":true},"heapdump":{"href":"http://localhost:8080/actuator/heapdump","templated":false},"threaddump":{"href":"http://localhost:8080/actuator/threaddump","templated":false},"metrics-requiredMetricName":{"href":"http://localhost:8080/actuator/metrics/{requiredMetricName}","templated":true},"metrics":{"href":"http://localhost:8080/actuator/metrics","templated":false},"scheduledtasks":{"href":"http://localhost:8080/actuator/scheduledtasks","templated":false},"httptrace":{"href":"http://localhost:8080/actuator/httptrace","templated":false},"mappings":{"href":"http://localhost:8080/actuator/mappings","templated":false}}
}
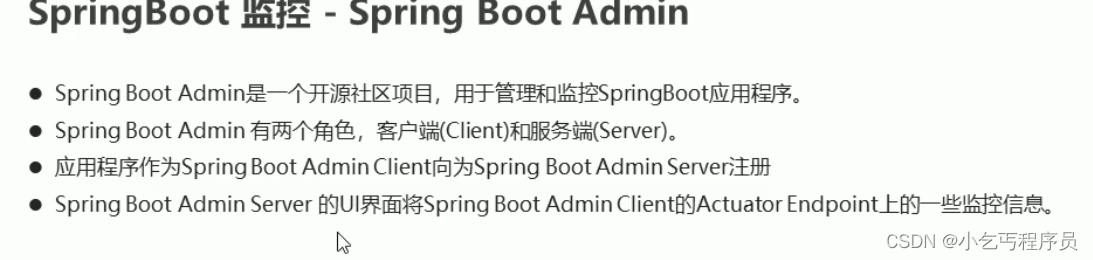
16-SpringBoot监控-springboot admin图形化界面使用
SpringBoot Admin 有两个角色,客户端(Client)和服务端(Server)。
以下为创建服务端和客户端工程步骤:
admin-server:
①创建 admin-server 模块
②导入依赖坐标 admin-starter-server


de.codecentric spring-boot-admin-starter-server ③在引导类上启用监控功能@EnableAdminServer
@EnableAdminServer
@SpringBootApplication
public class SpringbootAdminServerApplication {public static void main(String[] args) {SpringApplication.run(SpringbootAdminServerApplication.class, args);}}
admin-client:
①创建 admin-client 模块
②导入依赖坐标 admin-starter-client
de.codecentric spring-boot-admin-starter-client ③配置相关信息:server地址等
# 执行admin.server地址
spring.boot.admin.client.url=http://localhost:9000management.endpoint.health.show-details=always
management.endpoints.web.exposure.include=*
④启动server和client服务,访问server
17-SpringBoot部署
SpringBoot 项目开发完毕后,支持两种方式部署到服务器:
①jar包(官方推荐)
②war包
更改pom文件中的打包方式为war
修改启动类
import org.springframework.boot.SpringApplication;
import org.springframework.boot.autoconfigure.SpringBootApplication;
import org.springframework.boot.builder.SpringApplicationBuilder;
import org.springframework.boot.web.servlet.support.SpringBootServletInitializer;@SpringBootApplication
public class SpringbootDeployApplication extends SpringBootServletInitializer {public static void main(String[] args) {SpringApplication.run(SpringbootDeployApplication.class, args);}@Overrideprotected SpringApplicationBuilder configure(SpringApplicationBuilder builder) {return builder.sources(SpringbootDeployApplication.class);}
}
指定打包的名称
springboot org.springframework.boot spring-boot-maven-plugin