一篇文章带你熟悉zabbix企业级监控平台
一、.zabbix介绍
Zabbix 是一个企业级的分布式开源监控方案。
Zabbix是一款能够监控各种网络参数以及服务器健康性和完整性的软件。Zabbix使用灵活的通知机制,允许用户为几乎任何事件配置基于邮件的告警。这样可以快速反馈服务器的问题。
Zabbix支持主动轮询和被动捕获。Zabbix所有的报告、统计信息和配置参数都可以通过基于Web的前端页面进行访问。基于Web的前端页面可以确保您从任何方面评估您的网络状态和服务器的健康性。
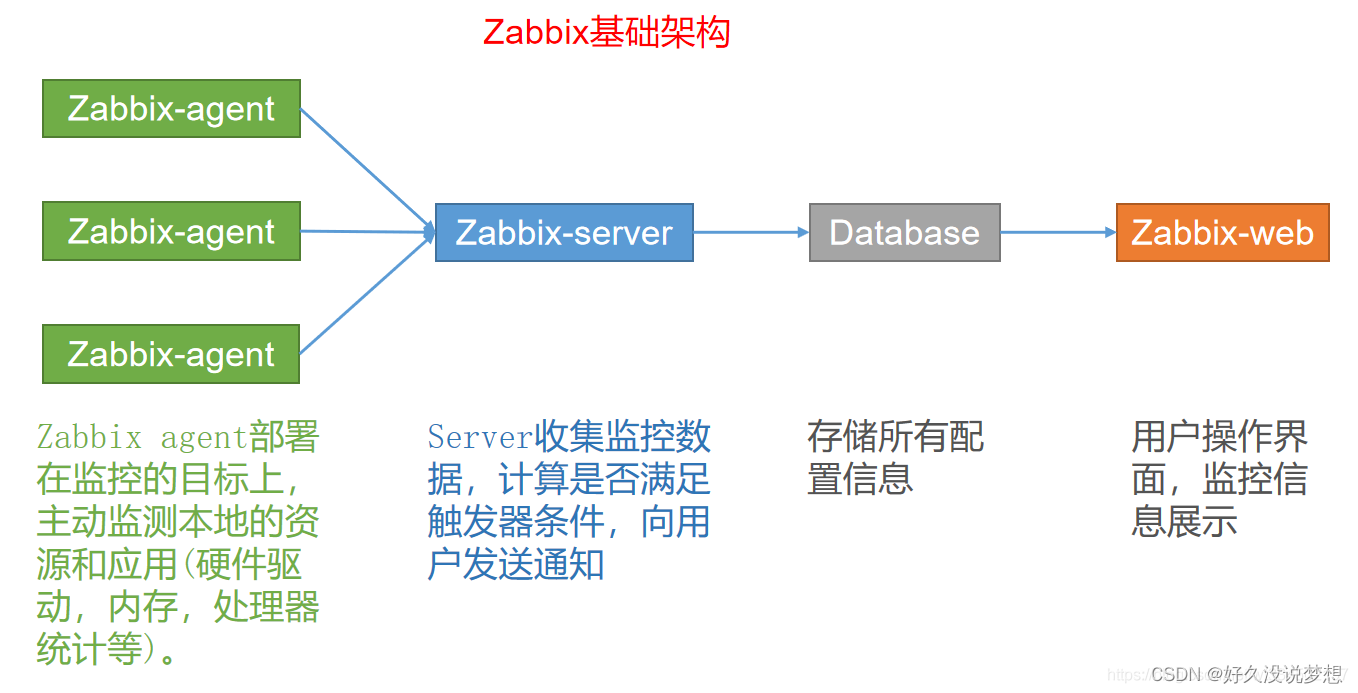
二、zabbix组件
Zabbix server是整个Zabbix软件的核心程序。
Server通过轮询和捕获数据,计算是否满足触发器条件,向用户发送通知。是agent程序报告系统可用性、系统完整性和统计数据的核心组件,是所有配置信息、统计信息和操作数据的核心存储器。
数据库存储:所有配置信息和Zabbix收集到的数据都被存储在数据库;
web界面:为了从任何地方和任何平台都可以轻松的访问Zabbix, 提供基于Web的Zabbix界面。该界面是Zabbix Server的一部分,通常(但不一定)跟Zabbix Server运行在同一台物理机器上。
Zabbix proxy: 可以替Zabbix Server收集性能和可用性数据。
Proxy代理服务器:是Zabbix软件可选择部署的一部分,也可以帮助单台Zabbix Server分担负载压力。
Zabbix agents监控代理: 部署在监控目标上,能够主动监控本地资源和应用程序,并将收集到的数据报告给Zabbix Server。
三、zabbix 工作原理
zabbix-server,mysql数据库,zabbix-web gui是可以分布安装在不同服务器,zabbix-server启动时读取配置文件
zabbix_server.conf来运行zabbix-server服务并且将日志输出到zabbix-server.log文件;zabbix-serevr通过主动模式或者被动模式获取数据,zabbix-agent服务器启动时会读取配置文件zabbix-agent.conf输出日志到配置文件zabbix-agent.log;zabbix-server服务通过zabbix-web gui从数据库提取数据绘制图形在浏览器里面进行展示;
zabbix收集数据分为主动和被动两种模式:
被动模式:zabbix-server服务主动请求zabbix-agent服务,zabbix-service通过zabbix-get方式获取zabbix-agent端的数据;
主动模式:zabbix-agent主动将收集的数据定时通过zabbix-sender进程将数据发送给zabbix-server服务并且存储在本地数据库;
四、zabbix安装与配置
可以参考官网:https://www.zabbix.com/
安装源
将仓库指向清华下载站
[root@server1 zabbix]# cd /etc/yum.repos.d/
[root@server1 yum.repos.d]# vim zabbix.repo
[zabbix]
name=Zabbix Official Repository - $basearch
baseurl=https://mirrors.tuna.tsinghua.edu.cn/zabbix/zabbix/5.0/rhel/7/$basearch/
enabled=1
gpgcheck=0[zabbix-frontend]
name=Zabbix Official Repository frontend - $basearch
baseurl=https://mirrors.tuna.tsinghua.edu.cn/zabbix/zabbix/5.0/rhel/7/$basearch/frontend
enabled=1
gpgcheck=0[zabbix-non-supported]
name=Zabbix Official Repository non-supported - $basearch
baseurl=https://mirrors.tuna.tsinghua.edu.cn/zabbix/non-supported/rhel/7/$basearch/
enabled=1
gpgcheck=0
安装部署包server和agent
[root@server1 yum.repos.d]# yum install zabbix-server-mysql zabbix-agent安装前端
[root@server1 ~]# yum install -y centos-release-scl-2-3.el7.centos.noarch.rpm centos-release-scl-rh-2-3.el7.centos.noarch.rpm
[root@server1 ~]# yum install zabbix-web-mysql-scl zabbix-apache-conf-scl
安装mysql数据库
[root@server1 ~]# tar xf mysql-5.7.33-1.el7.x86_64.rpm-bundle.tar
[root@server1 ~]# yum install -y mysql-community-client-5.7.33-1.el7.x86_64.rpm mysql-community-common-5.7.33-1.el7.x86_64.rpm mysql-community-libs-5.7.33-1.el7.x86_64.rpm mysql-community-libs-compat-5.7.33-1.el7.x86_64.rpm mysql-community-server-5.7.33-1.el7.x86_64.rpm
#设置开机自启
[root@server1 ~]# systemctl  enable --now mysqld
获取初始化密码
[root@server1 ~]# grep 'temporary password' /var/log/mysqld.log
2023-02-26T08:52:37.676190Z 1 [Note] A temporary password is generated for root@localhost: s!DOgafjt9+d
Mysql安全启动配置向导
[root@server1 ~]# mysql_secure_installation安装完mysql-server 会提示可以运行mysql_secure_installation。运行mysql_secure_installation会执行以下几个设置:
- 为root用户设置密码
- 删除匿名账号
- 取消root用户远程登录
- 删除test库和对test库的访问权限
- 刷新授权表使修改生效
使用的mysql版本为5.7.33默认会有密码强壮度检测
密码需要大于8位切必须要有大小写字母特殊符号和数字
Securing the MySQL server deployment.Enter password for user root:The existing password for the user account root has expired. Please set a new password.New password:Re-enter new password:... Failed! Error: Your password does not satisfy the current policy requirementsNew password:Re-enter new password:
The 'validate_password' plugin is installed on the server.
The subsequent steps will run with the existing configuration
of the plugin.
Using existing password for root.Estimated strength of the password: 100
Change the password for root ? ((Press y|Y for Yes, any other key for No) :... skipping.
By default, a MySQL installation has an anonymous user,
allowing anyone to log into MySQL without having to have
a user account created for them. This is intended only for
testing, and to make the installation go a bit smoother.
You should remove them before moving into a production
environment.Remove anonymous users? (Press y|Y for Yes, any other key for No) : y
Success.Normally, root should only be allowed to connect from
'localhost'. This ensures that someone cannot guess at
the root password from the network.Disallow root login remotely? (Press y|Y for Yes, any other key for No) : y
Success.By default, MySQL comes with a database named 'test' that
anyone can access. This is also intended only for testing,
and should be removed before moving into a production
environment.Remove test database and access to it? (Press y|Y for Yes, any other key for No) : y- Dropping test database...
Success.- Removing privileges on test database...
Success.Reloading the privilege tables will ensure that all changes
made so far will take effect immediately.Reload privilege tables now? (Press y|Y for Yes, any other key for No) : y
Success.All done!
创建zabbix数据库
在MySQL上安装Zabbix数据库和用户
[root@server1 ~]# mysql -p
mysql> create database zabbix character set utf8 collate utf8_bin;
Query OK, 1 row affected (0.00 sec)mysql> create user zabbix@localhost identified by 'Whr12345-';
Query OK, 0 rows affected (0.00 sec)mysql> grant all privileges on zabbix.* to zabbix@localhost;
Query OK, 0 rows affected (0.00 sec)mysql> set global log_bin_trust_function_creators = 1;
Query OK, 0 rows affected (0.00 sec)
导入数据
将zabbix自带的数据库表迁移到数据库中,迁移过程中千万不要强制结束,不然重新迁移会报错,需要将数据库清理干净在进行迁移。
[root@server1 ~]# zcat /usr/share/doc/zabbix-server-mysql-5.0.31/create.sql.gz | mysql -uzabbix -pYakexi+007 zabbix导入后再禁用数据库参数
[root@server1 ~]# mysql -p
mysql> set global log_bin_trust_function_creators = 0;
Query OK, 0 rows affected (0.00 sec)
配置zabbix server
[root@server1 ~]# vim /etc/zabbix/zabbix_server.conf
#只需修改数据库密码
DBPassword=Abc123456-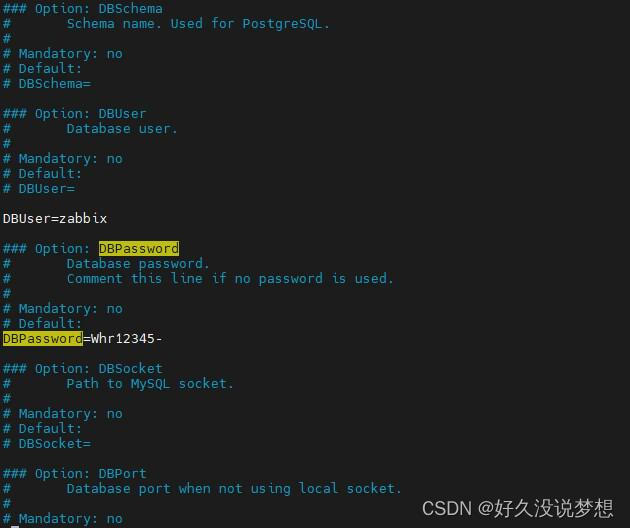
配置zabbix前端
[root@server1 zabbix]# vim /etc/opt/rh/rh-php72/php-fpm.d/zabbix.conf
#去掉此行的注释,并修改时区
php_value[date.timezone] = Asia/Shanghai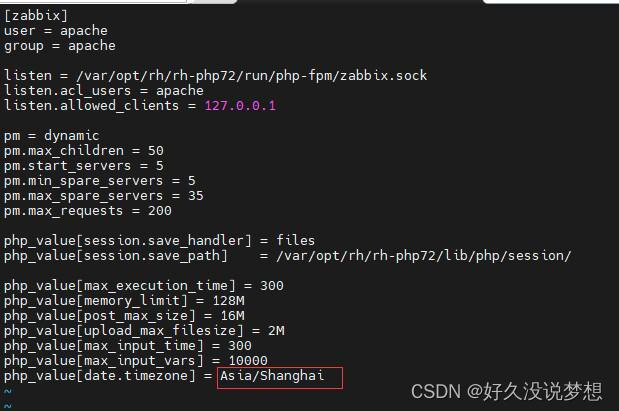
启动服务
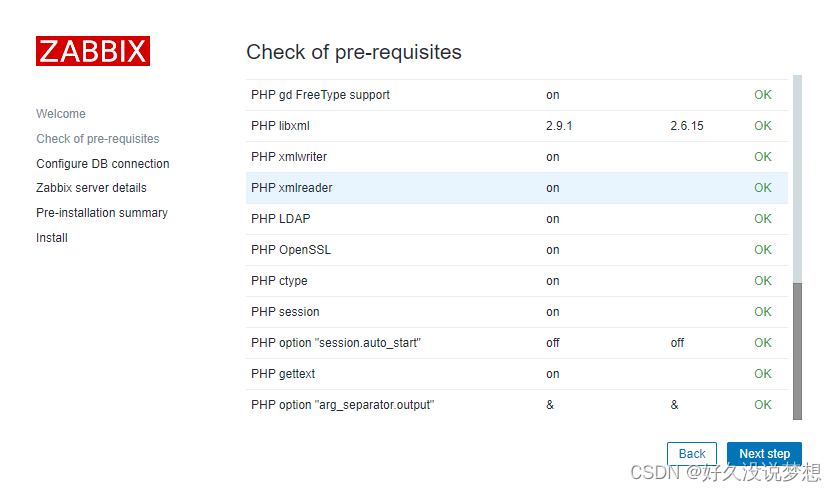
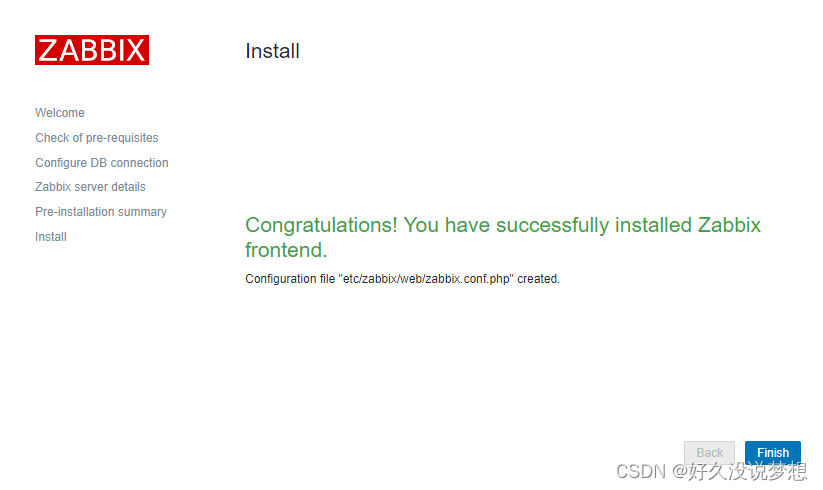
[root@server1 zabbix]# systemctl enable --now zabbix-server zabbix-agent httpd rh-php72-php-fpm访问前端:http://192.168.18.11/zabbix
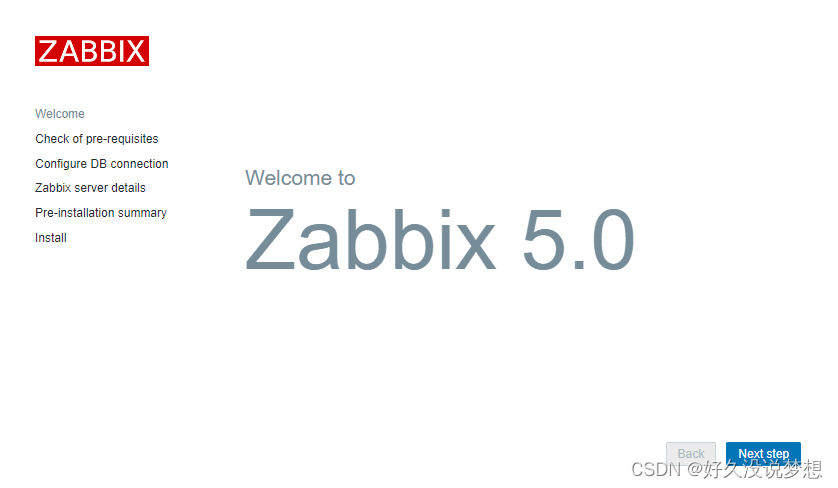
全为OK即可
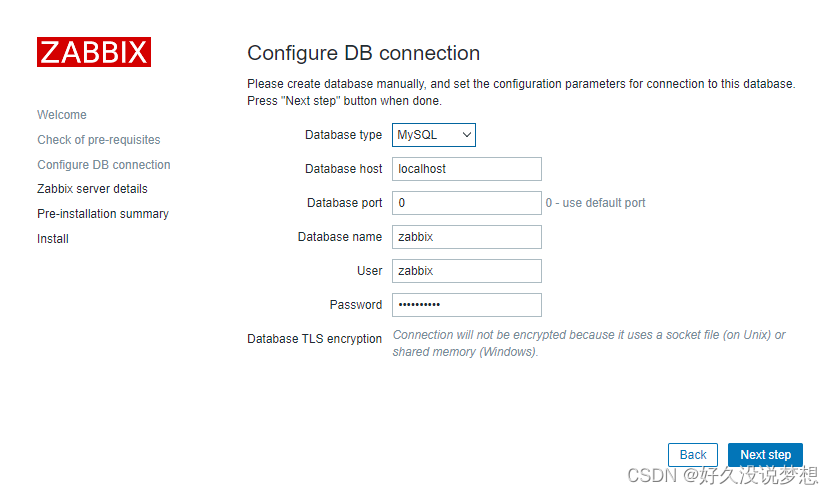
密码为数据库密码
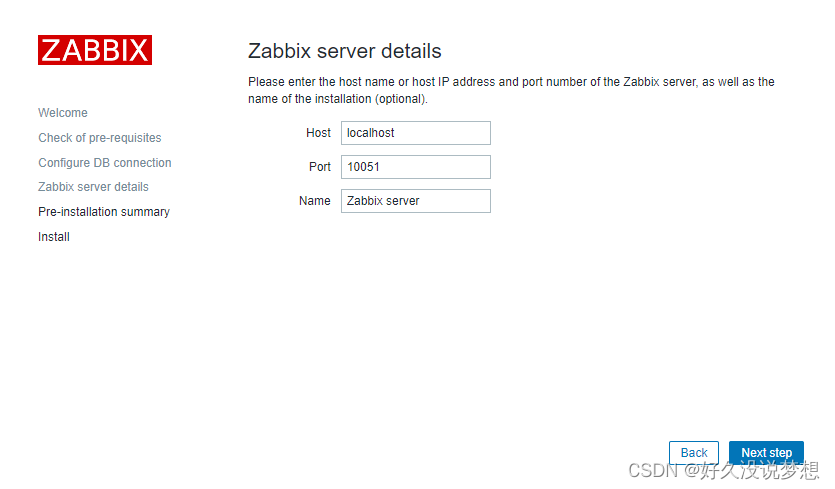
Name随意
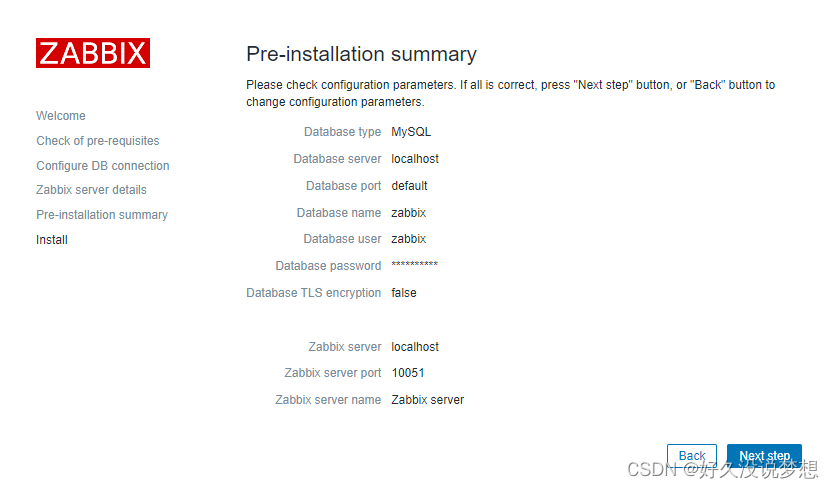
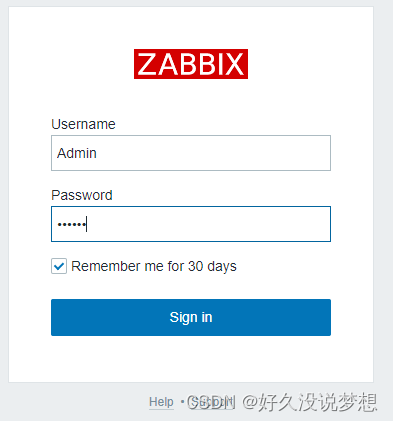
登录前端的用户密码是:Admin/zabbix
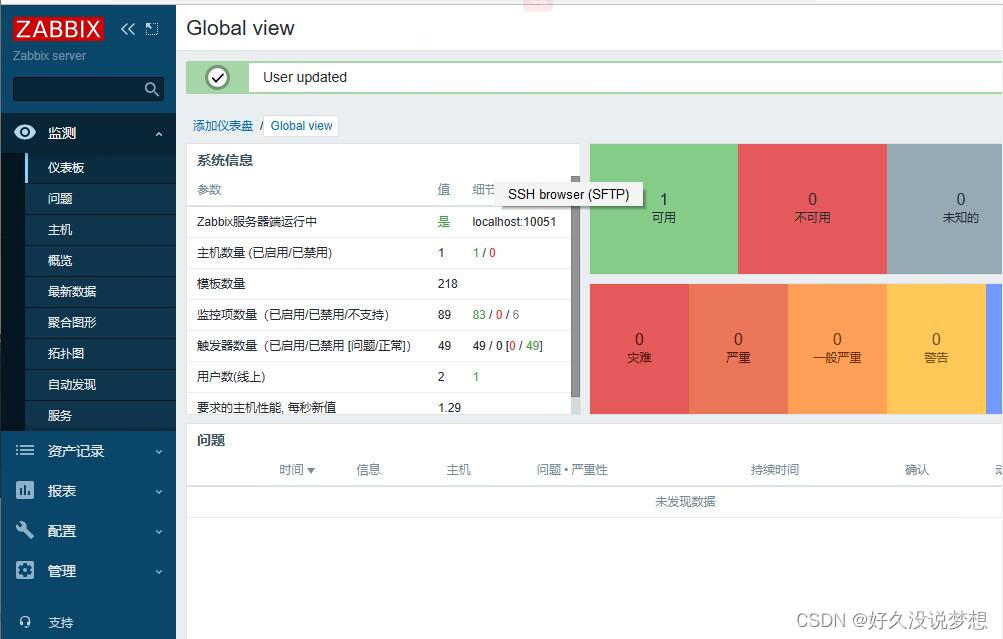
修改前端语言

修改字体文件
cp simkai.ttf /usr/share/zabbix/assets/fonts
cd /usr/share/zabbix/assets/fonts
[root@server1 fonts]# rm -f graphfont.ttf
[root@server1 fonts]# ln -s simkai.ttf graphfont.ttf


五、添加agent
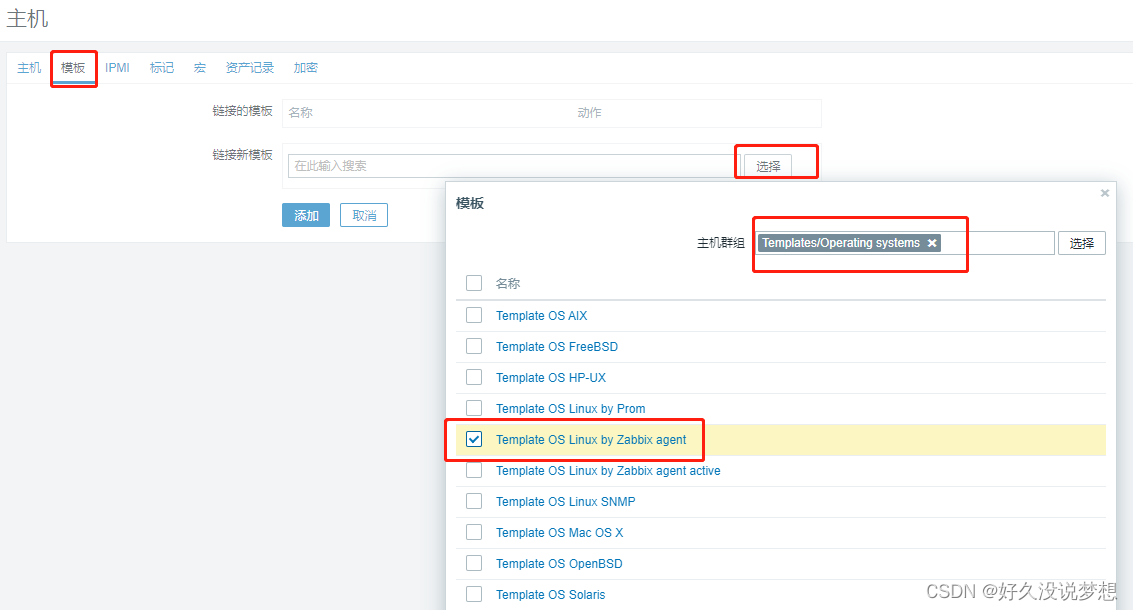
1、手动添加
agent配置
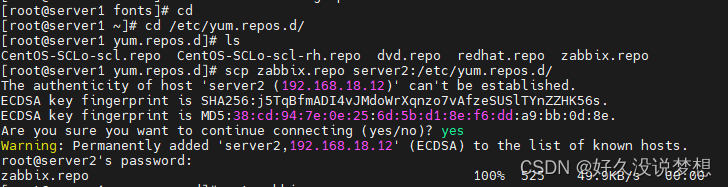
从server1拷贝repo文件
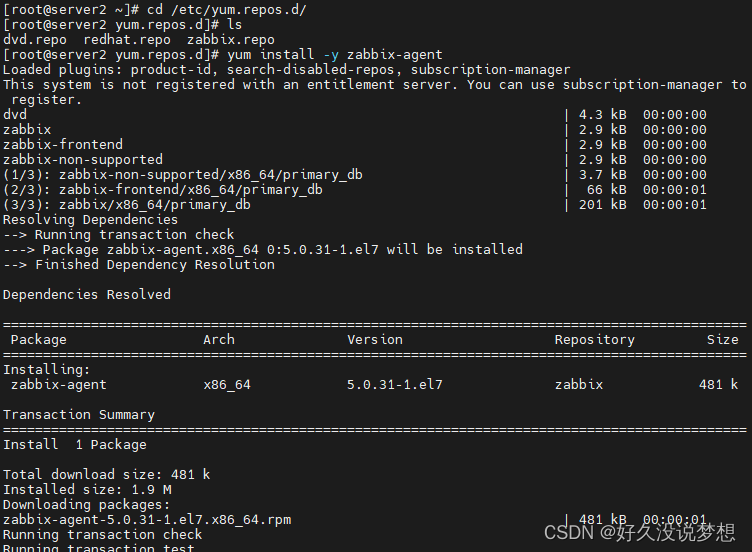
[root@server1 yum.repos.d]# scp zabbix.repo server2:/etc/yum.repos.d/
[root@server2 yum.repos.d]# yum install -y zabbix-agent
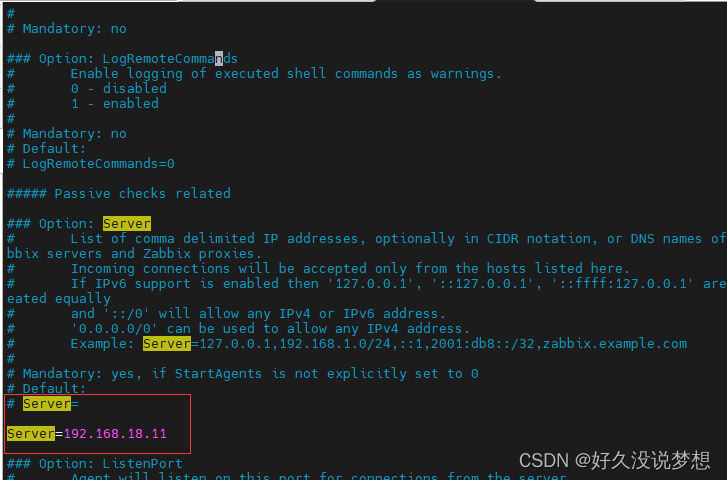
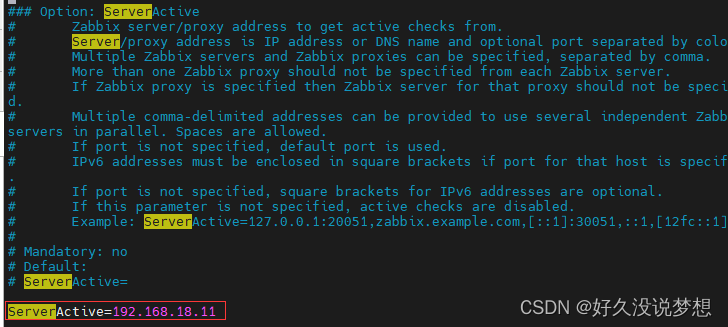
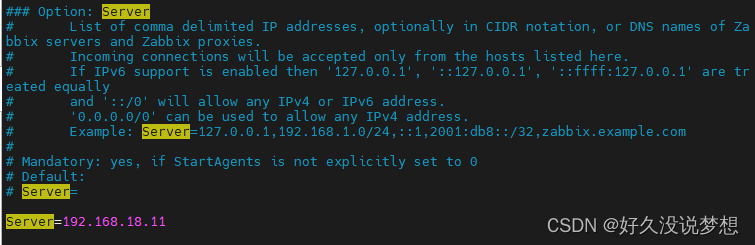
[root@server2 ~]# vim /etc/zabbix/zabbix_agentd.conf


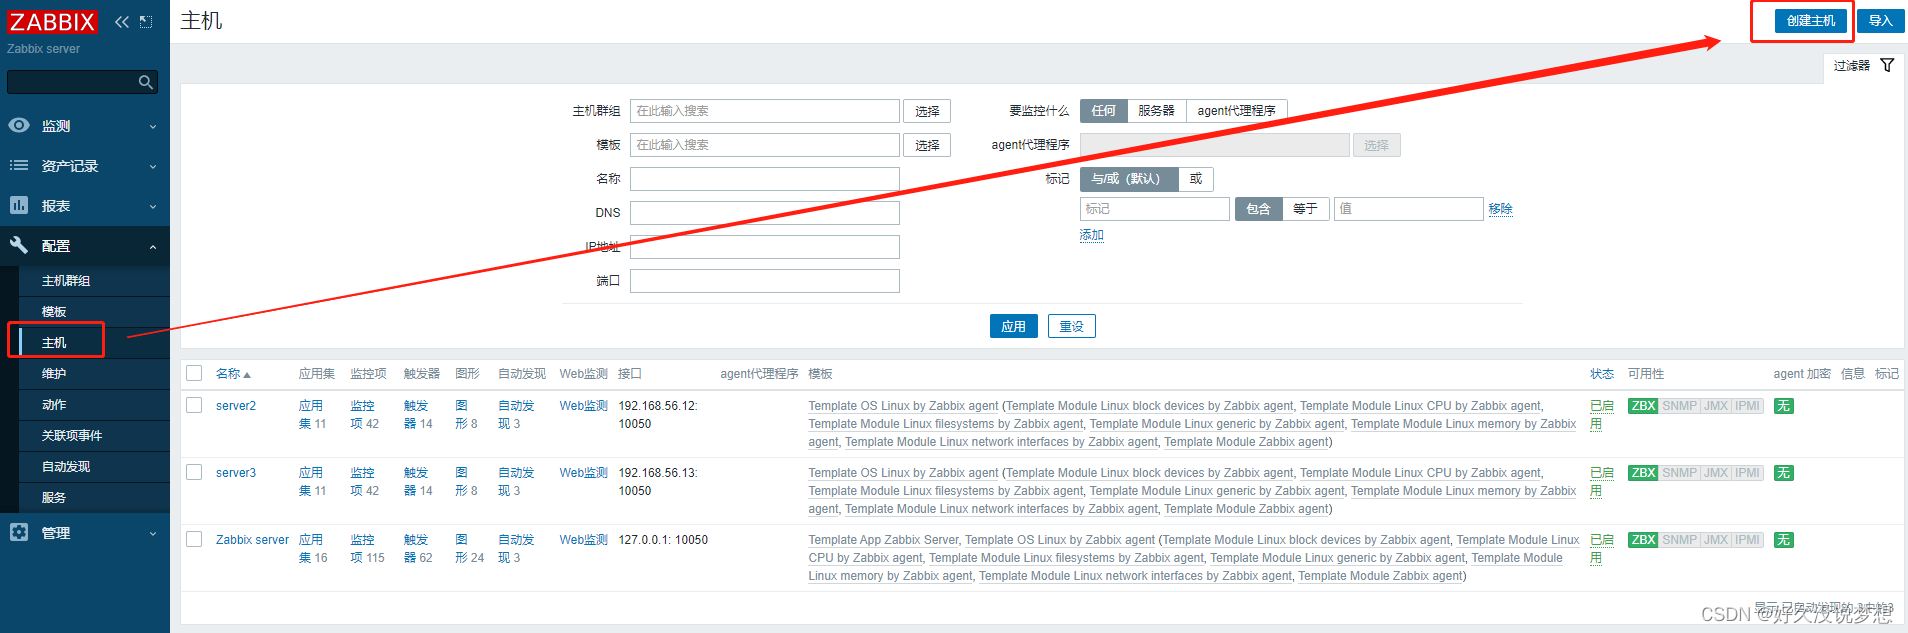
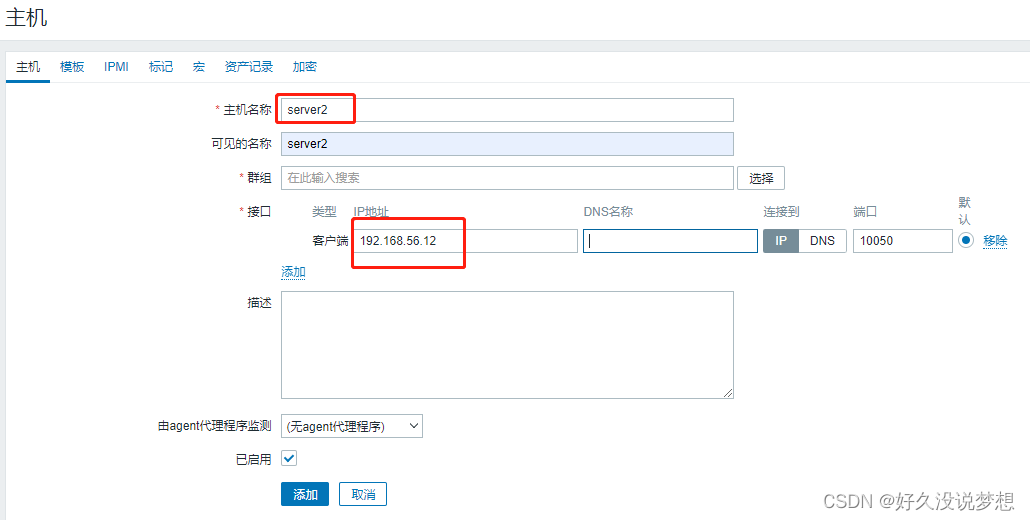
可用性变成绿色表示添加成功

2、自动发现
agent配置
从server1拷贝repo文件
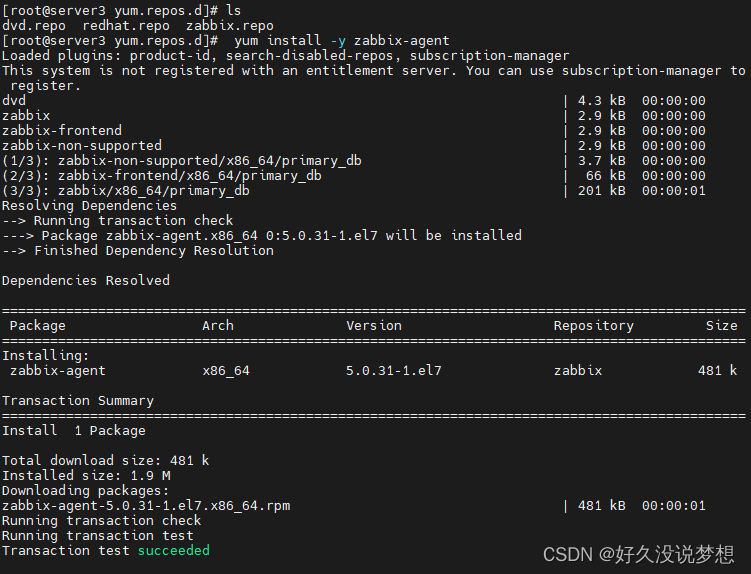
[root@server1 yum.repos.d]# scp zabbix.repo server3:/etc/yum.repos.d/

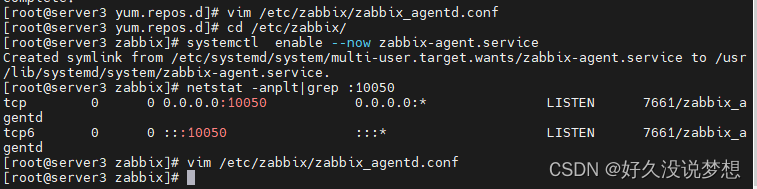
[root@server3 yum.repos.d]# yum install -y zabbix-agent
[root@server3 ~]# vim /etc/zabbix/zabbix_agentd.conf
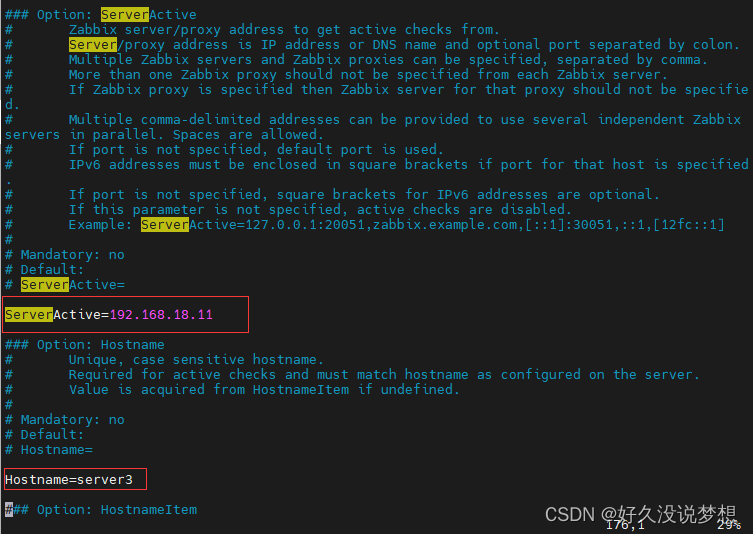
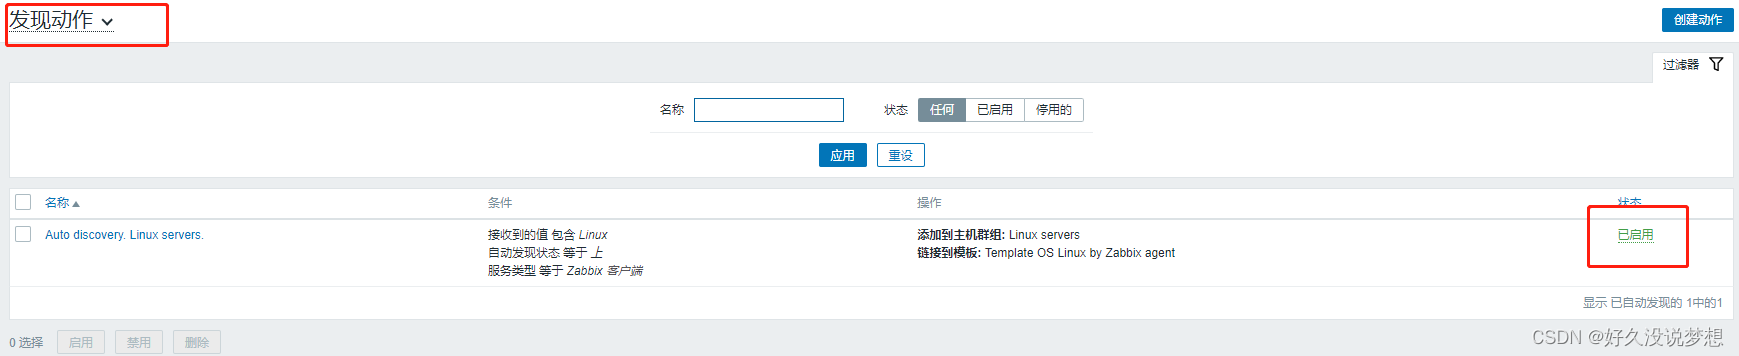
server端配置
选择发现动作,并激活
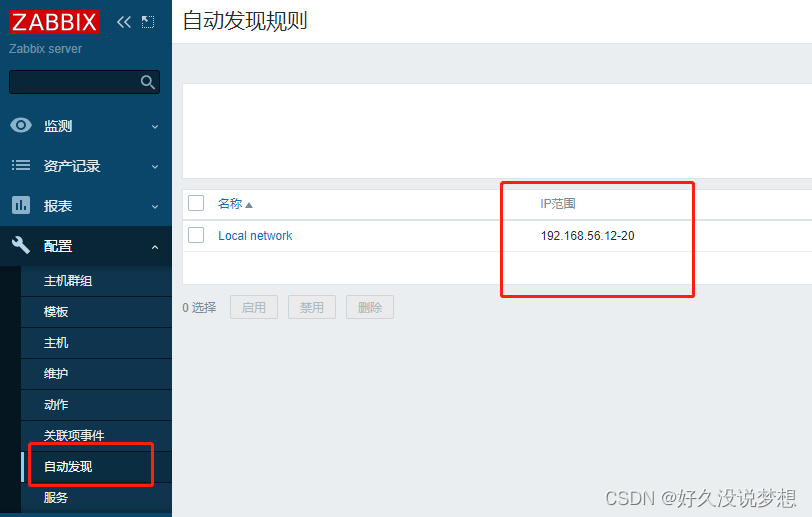
选择自动发现,修改实际的网络地址段,并激活
3、自动注册
先删除server3主机

停用自动发现规则

创建自动注册动作
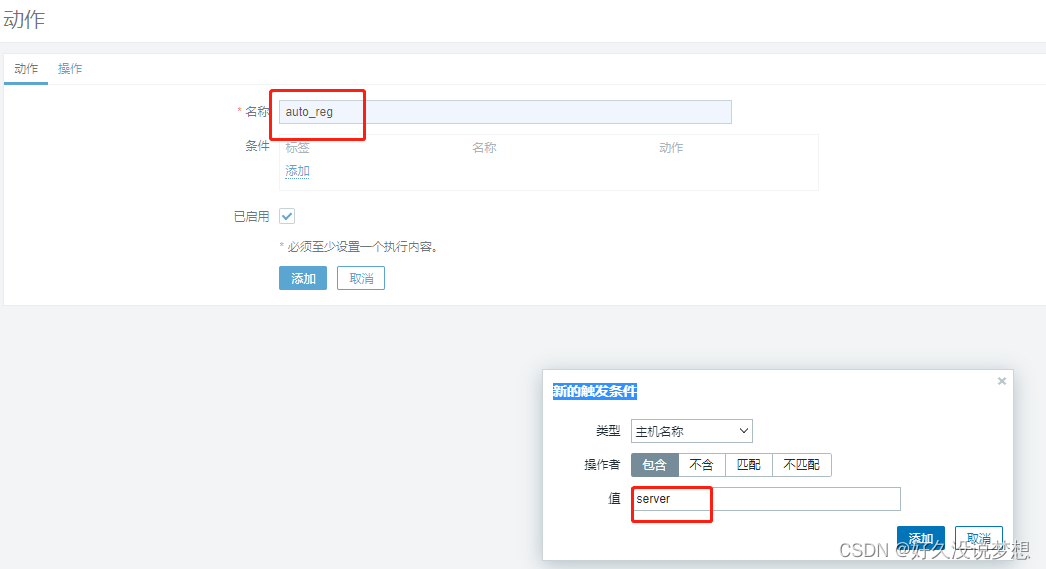

agent端重启服务
[root@server3 ~]# systemctl restart zabbix-agent.service
4、zabbix api
https://www.zabbix.com/documentation/5.0/zh/manual/api/reference/dhost/get
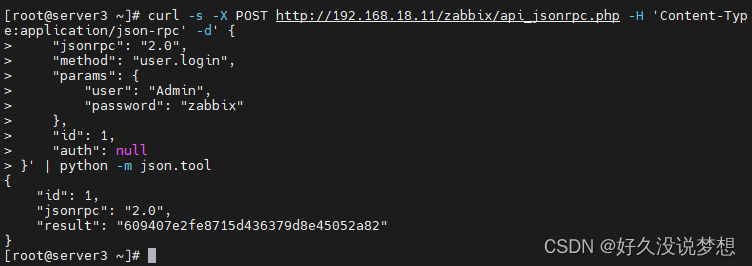
获取token
[root@server3 ~]# curl -s -X POST http://192.168.18.11/zabbix/api_jsonrpc.php -H 'Content-Type:application/json-rpc' -d' {
"jsonrpc": "2.0",
"method": "user.login",
"params": {
"user": "Admin",
"password": "zabbix"
},
"id": 1,
"auth": null
}' | python -m json.tool
认证后获取的token值
{
"id": 1,
"jsonrpc": "2.0",
"result": "609407e2fe8715d436379d8e45052a82"
}
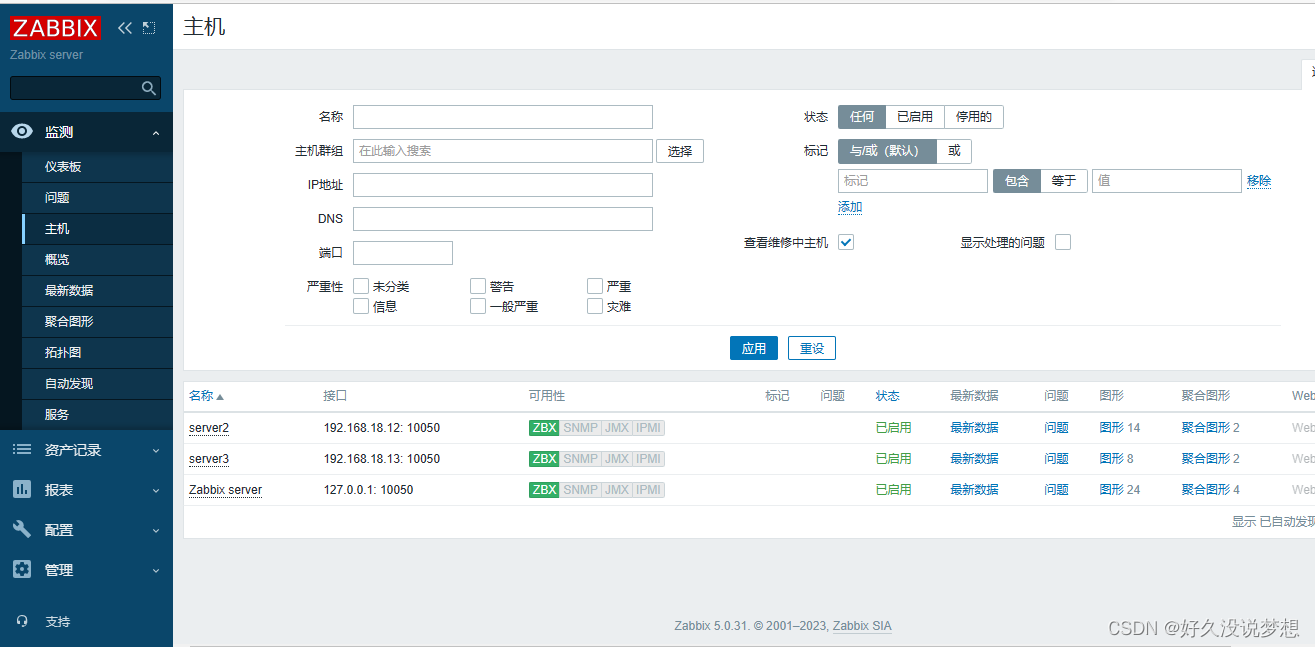
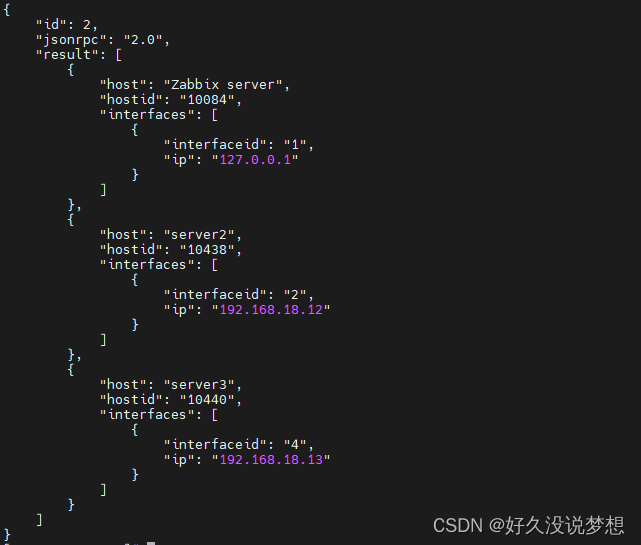
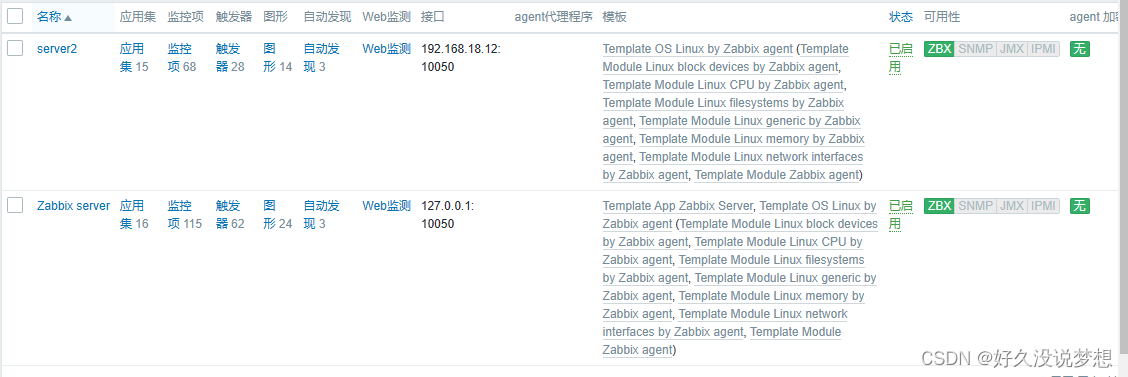
检索主机
curl -s -X POST http://192.168.18.11/zabbix/api_jsonrpc.php -H 'Content-Type: application/json-rpc' -d '
{
"jsonrpc": "2.0",
"method": "host.get",
"params": {
"output": [
"hostid",
"host"
],
"selectInterfaces": [
"interfaceid",
"ip"
]
},
"id": 2,
"auth": "609407e2fe8715d436379d8e45052a82"
}' | python -m json.tool
{
"id": 2,
"jsonrpc": "2.0",
"result": [
{
"host": "Zabbix server",
"hostid": "10084",
"interfaces": [
{
"interfaceid": "1",
"ip": "127.0.0.1"
}
]
},
{
"host": "server2",
"hostid": "10438",
"interfaces": [
{
"interfaceid": "2",
"ip": "192.168.18.12"
}
]
},
{
"host": "server3",
"hostid": "10440",
"interfaces": [
{
"interfaceid": "4",
"ip": "192.168.18.13"
}
]
}
]
}

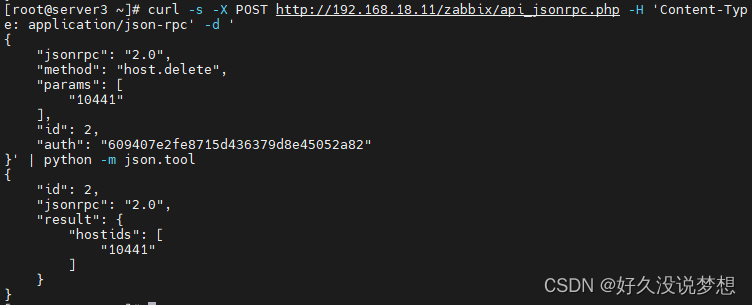
删除主机
[root@server3 ~]# curl -s -X POST http://192.168.18.11/zabbix/api_jsonrpc.php -H 'Content-Type: application/json-rpc' -d '
{
"jsonrpc": "2.0",
"method": "host.delete",
"params": [
"10441"
],
"id": 2,
"auth": "609407e2fe8715d436379d8e45052a82"
}' | python -m json.tool
{
"id": 2,
"jsonrpc": "2.0",
"result": {
"hostids": [
"10441"
]
}
}

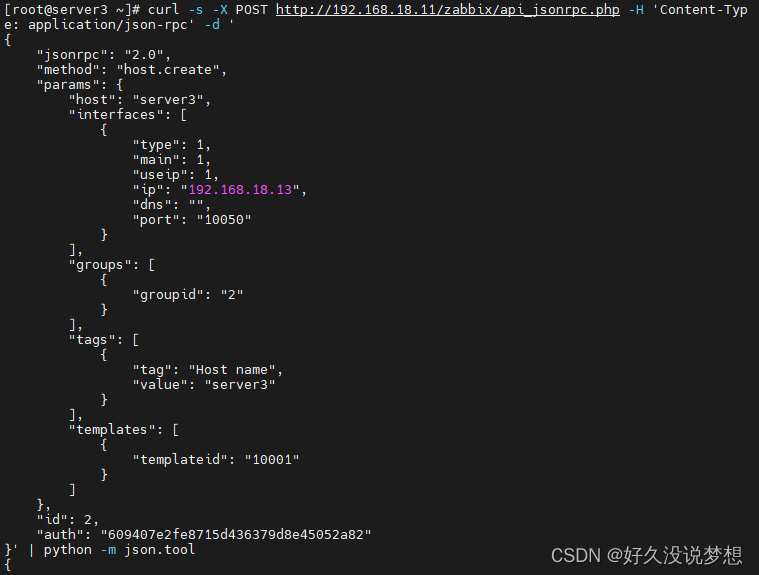
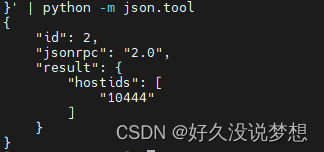
创建主机
curl -s -X POST http://192.168.18.11/zabbix/api_jsonrpc.php -H 'Content-Type: application/json-rpc' -d '
{
"jsonrpc": "2.0",
"method": "host.create",
"params": {
"host": "server3",
"interfaces": [
{
"type": 1,
"main": 1,
"useip": 1,
"ip": "192.168.18.13",
"dns": "",
"port": "10050"
}
],
"groups": [
{
"groupid": "2"
}
],
"tags": [
{
"tag": "Host name",
"value": "server3"
}
],
"templates": [
{
"templateid": "10001"
}
]
},
"id": 2,
"auth": "609407e2fe8715d436379d8e45052a82"
}' | python -m json.tool

六、服务监控
nginx监控
安装nginx
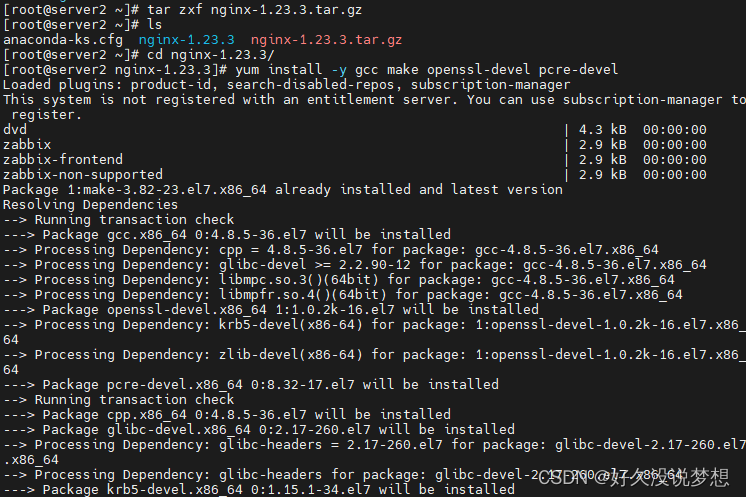
[root@server2 ~]# tar zxf nginx-1.23.3.tar.gz
[root@server2 ~]# cd nginx-1.23.3/
[root@server2 nginx-1.23.3]# yum install -y gcc make openssl-devel pcre-devel
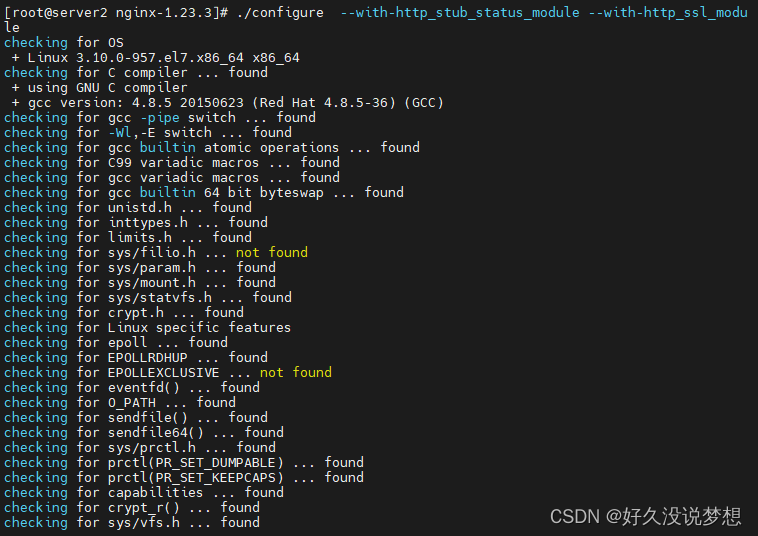
[root@server2 nginx-1.23.3]# ./configure --with-http_stub_status_module --with-http_ssl_module
[root@server2 nginx-1.23.3]# make && make install
[root@server2 nginx]# ln -s /usr/local/nginx/sbin/nginx /usr/local/bin/

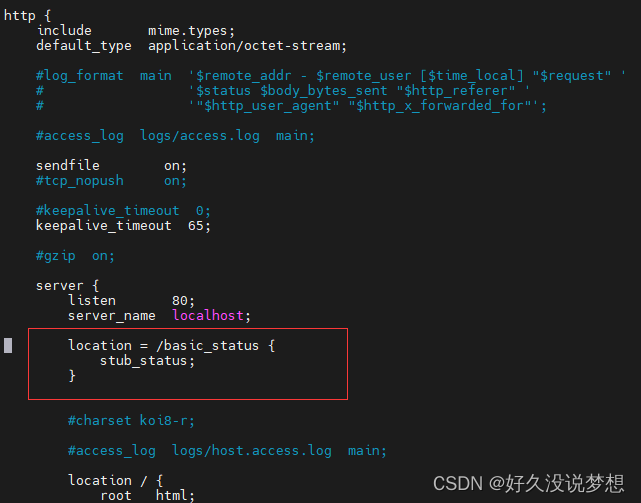
[root@server2 ~]# vim /usr/local/nginx/conf/nginx.conf
server {
listen 80;
server_name localhost;
...
location = /basic_status {
stub_status;
}
...
[root@server2 conf]# nginx
[root@server2 conf]# netstat -antlp|grep :80
tcp 0 0 0.0.0.0:80 0.0.0.0:* LISTEN 23962/nginx: master
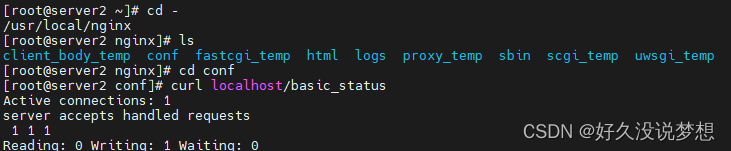
[root@server2 conf]# curl localhost/basic_status
Active connections: 1
server accepts handled requests
1 1 1
Reading: 0 Writing: 1 Waiting: 0
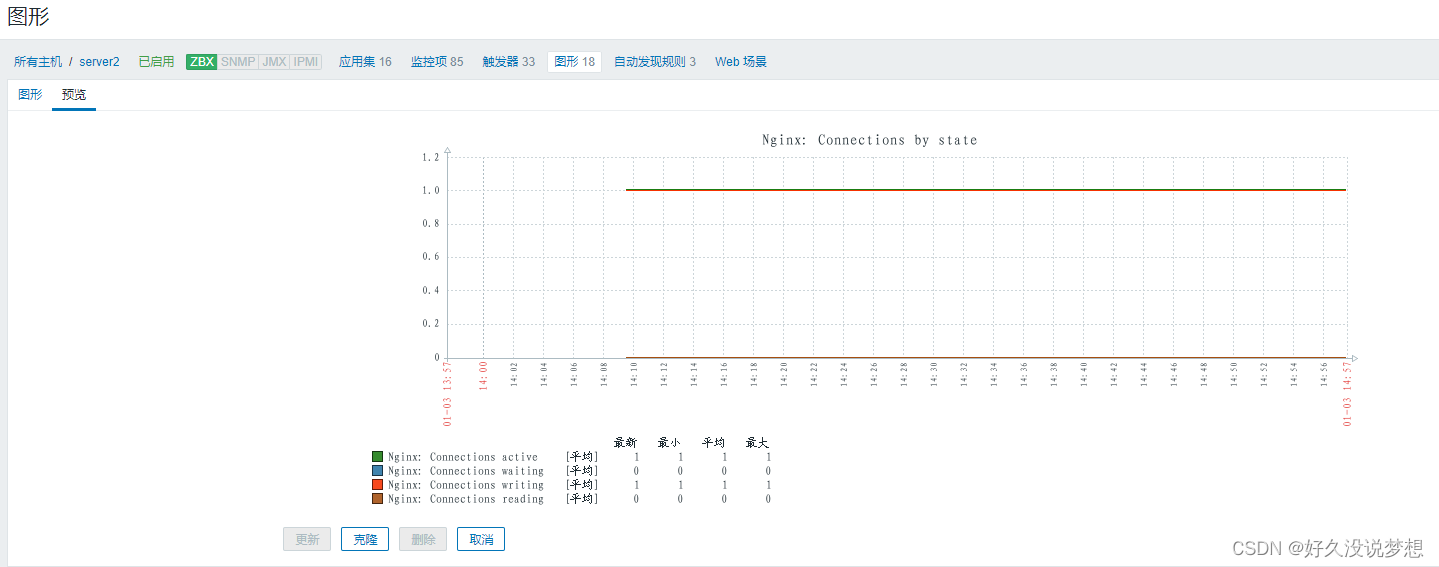
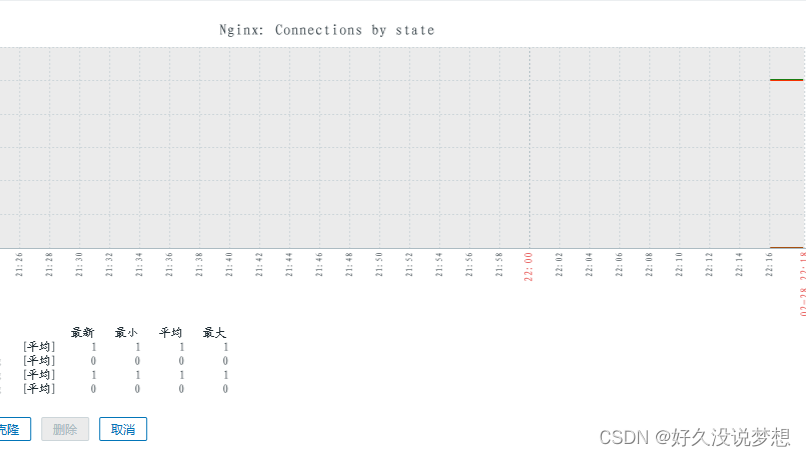
在server端为主机关联nginx服务监控模板
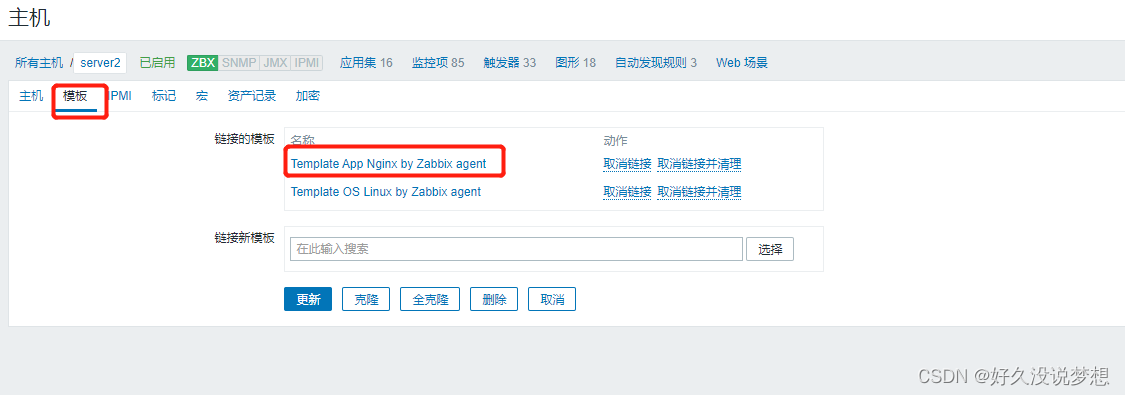
稍作等待,监控数据就会出来
mysql监控
zabbix自带mysql模板
拷贝模板
[root@server1 ~]# cp /usr/share/doc/zabbix-agent-5.0.31/userparameter_mysql.conf /etc/zabbix/zabbix_agentd.d/

重启agent
[root@server1 zabbix_agentd.d]# systemctl restart zabbix-agent.service

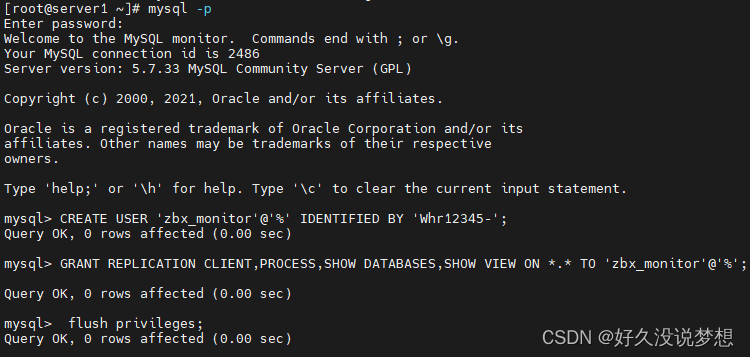
创建数据库连接用户
[root@server1 zabbix_agentd.d]# mysql -p
mysql> CREATE USER 'zbx_monitor'@'%' IDENTIFIED BY 'Whr12345-';
Query OK, 0 rows affected (0.00 sec)
mysql> GRANT REPLICATION CLIENT,PROCESS,SHOW DATABASES,SHOW VIEW ON *.* TO 'zbx_monitor'@'%';
Query OK, 0 rows affected (0.00 sec)
mysql> flush privileges;
Query OK, 0 rows affected (0.00 sec)
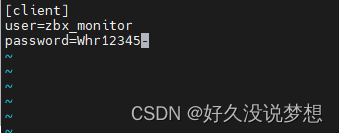
创建数据库连接文件
[root@server1 ~]# mkdir /var/lib/zabbix/
[root@server1 ~]# vim /var/lib/zabbix/.my.cnf

[client]
user=zbx_monitor
password=Whr12345-
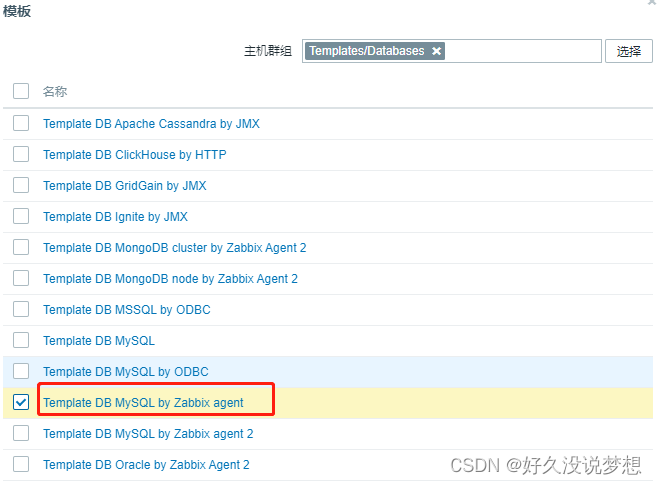
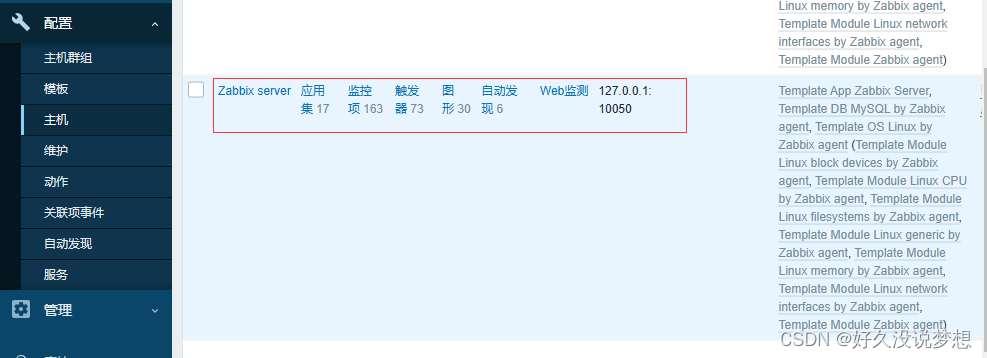
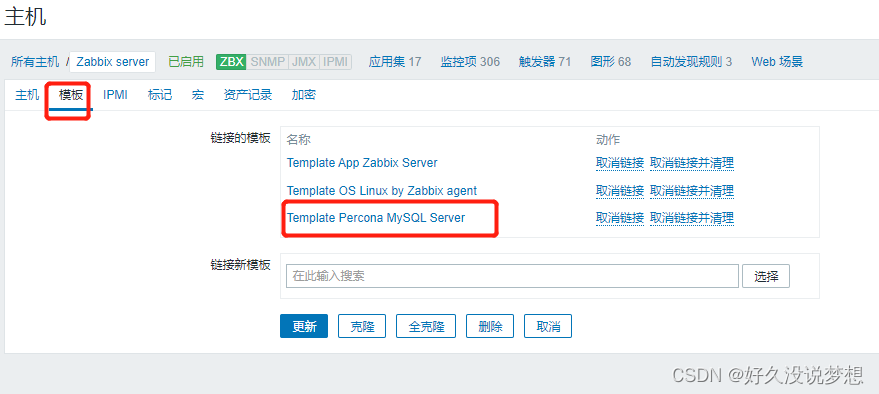
为zabbix server链接mysql监控模板
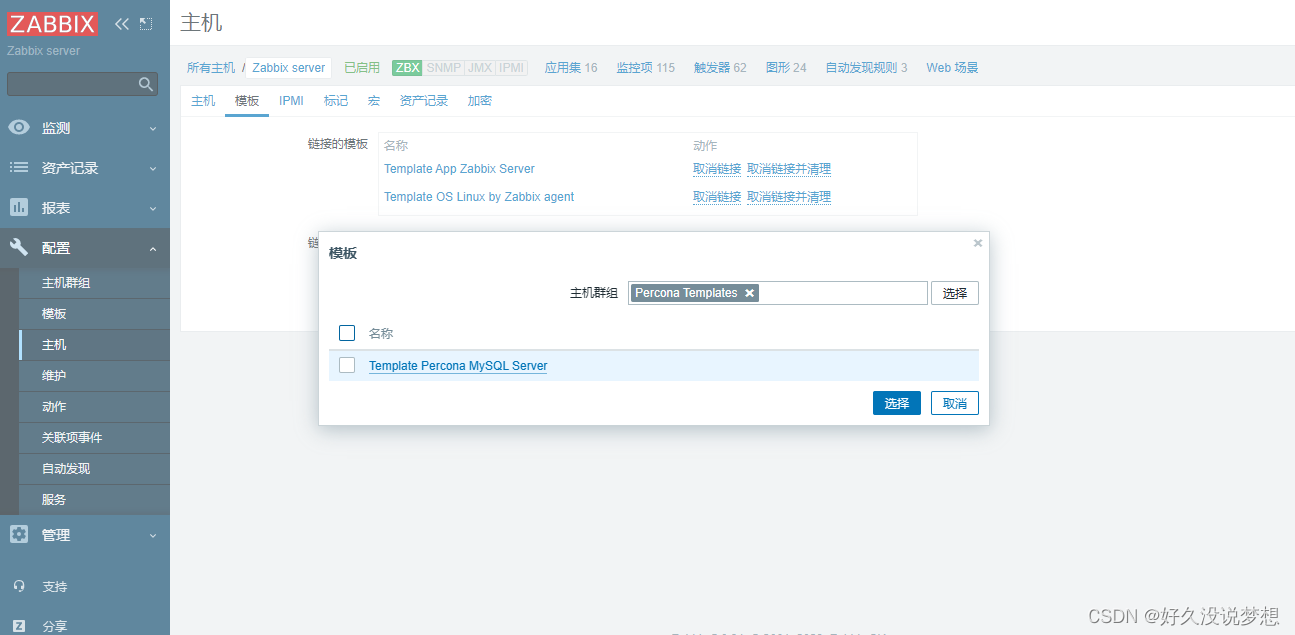
percona数据库模板
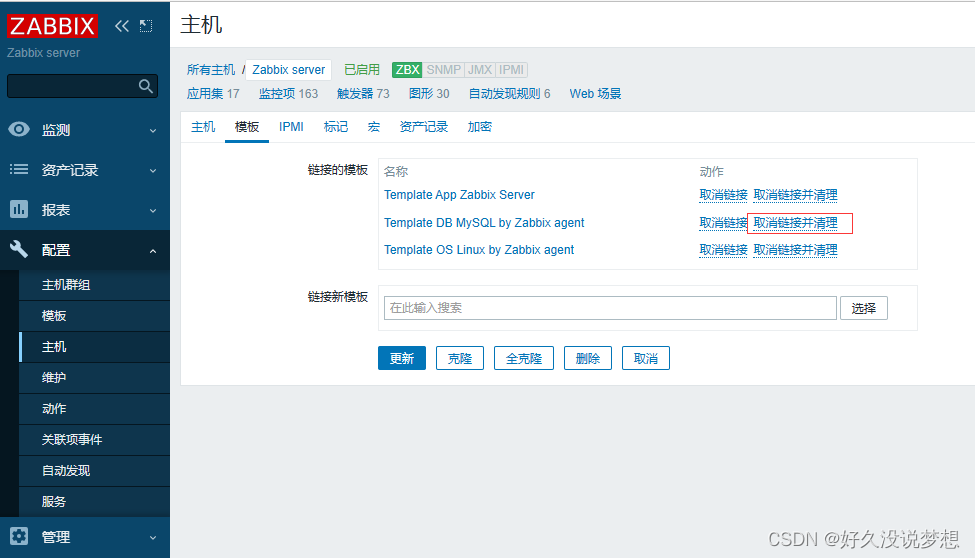
zabbix自带的mysql模板比较简单,所以推荐使用percona的数据库模板
首先删除自带的模版

[root@server1 ~]# rpm -ivh percona-zabbix-templates-1.1.8-1.noarch.rpm

[root@server1 scripts]# cd /var/lib/zabbix/percona/templates
[root@server1 templates]# cp userparameter_percona_mysql.conf /etc/zabbix/zabbix_agentd.d/
[root@server1 templates]# systemctl restart zabbix-agent.service

[root@server1 zabbix_agentd.d]# cd /var/lib/zabbix/percona/scripts/
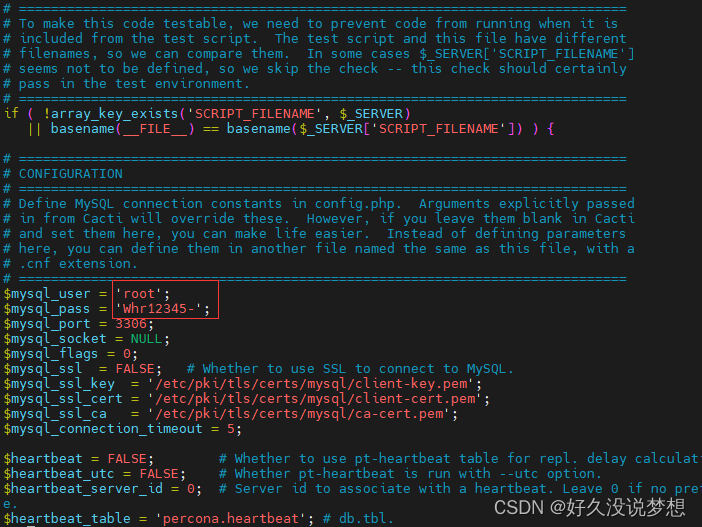
[root@server1 scripts]# vim ss_get_mysql_stats.php
...
$mysql_user = 'root';
$mysql_pass = 'Whr12345-';
测试脚本
[root@server1 scripts]# ln -s /opt/rh/rh-php72/root/usr/bin/php /usr/bin/php
[root@server1 scripts]# /var/lib/zabbix/percona/scripts/get_mysql_stats_wrapper.sh gg
20
有数据显示就表示正常

删除tmp下的缓存文件
[root@server1 tmp]# rm -f localhost-mysql_cacti_stats.txt
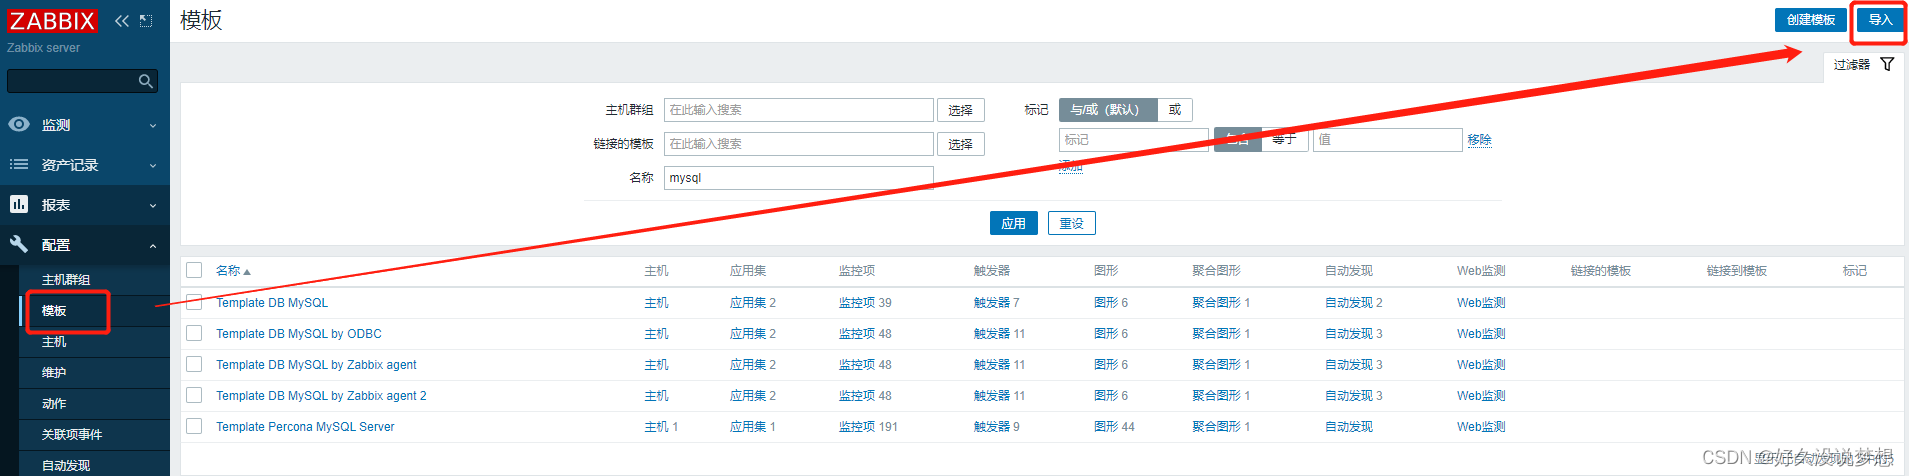
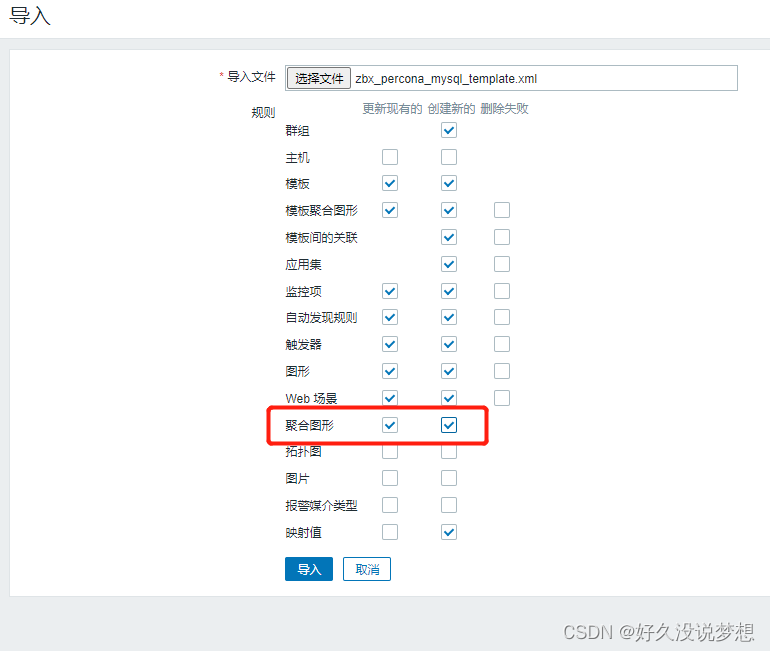
导入模板文件
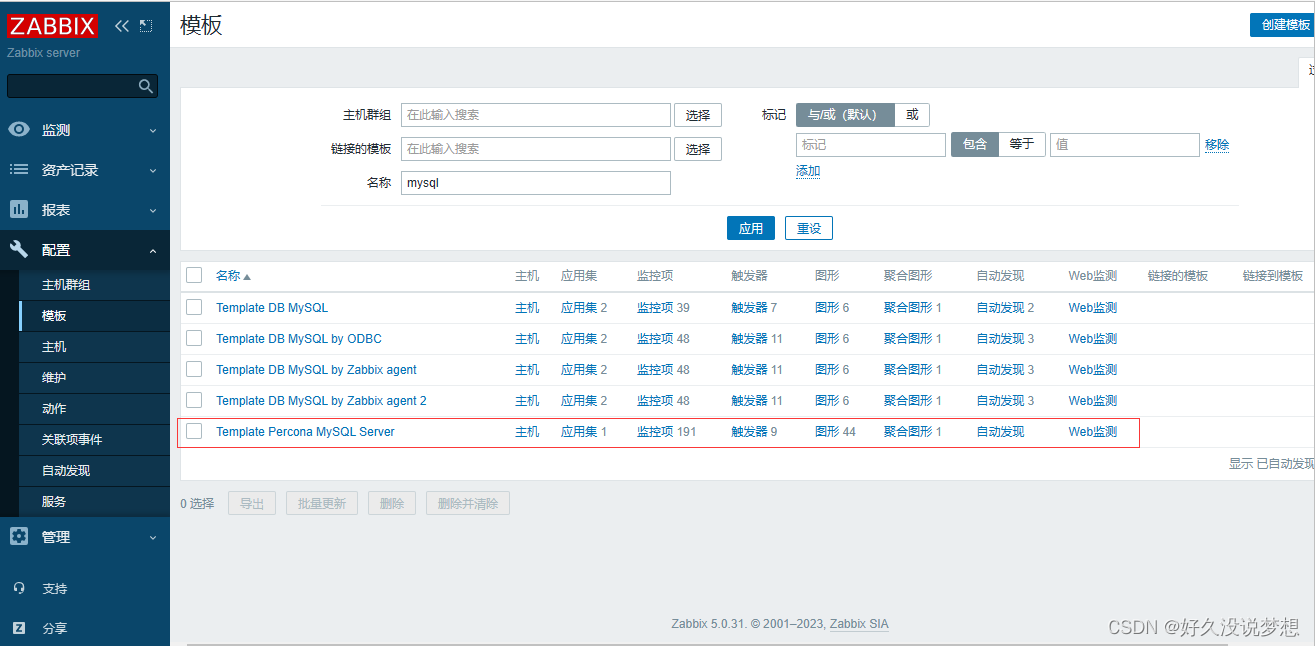
关联模板
等待监控数据出来

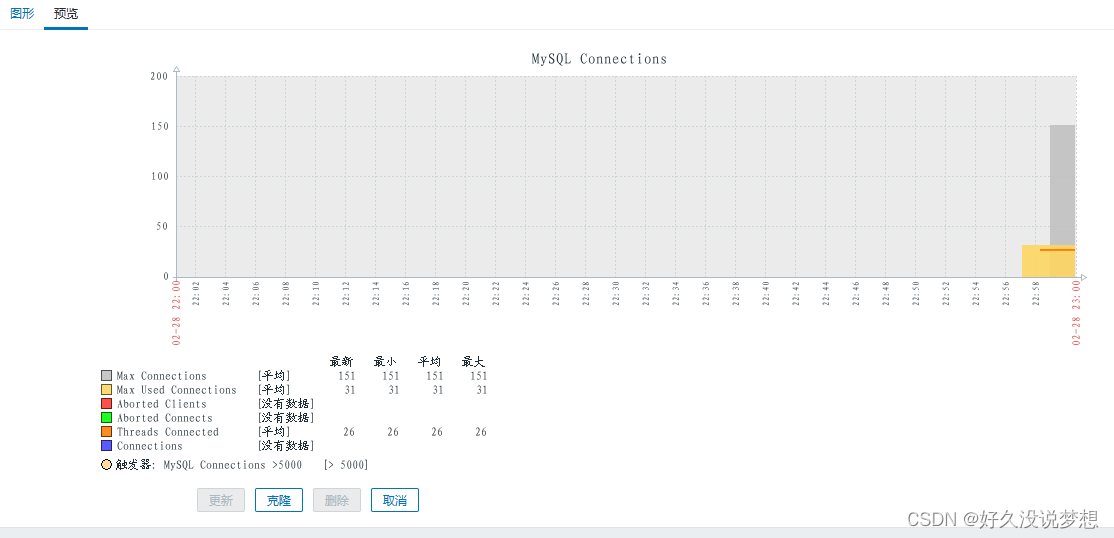
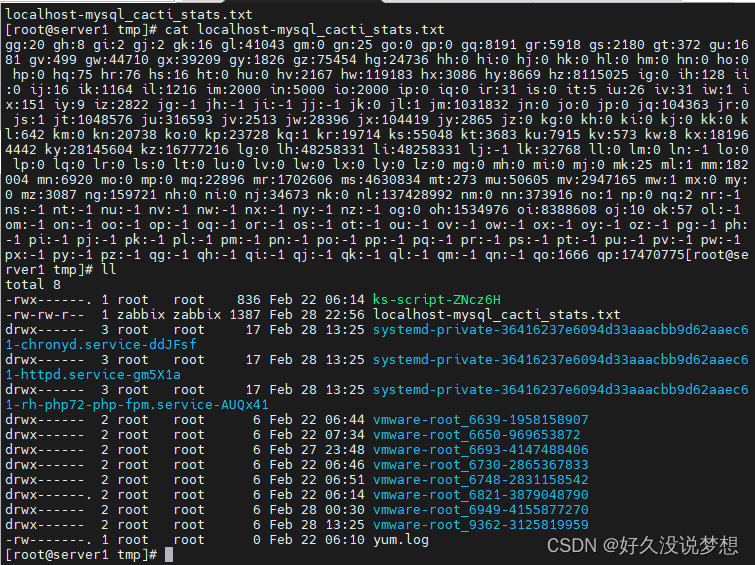
只要/tmp生成缓存文件就表示成功
[root@server1 tmp]# ls localhost-mysql_cacti_stats.txt
localhost-mysql_cacti_stats.txt
tomcat监控
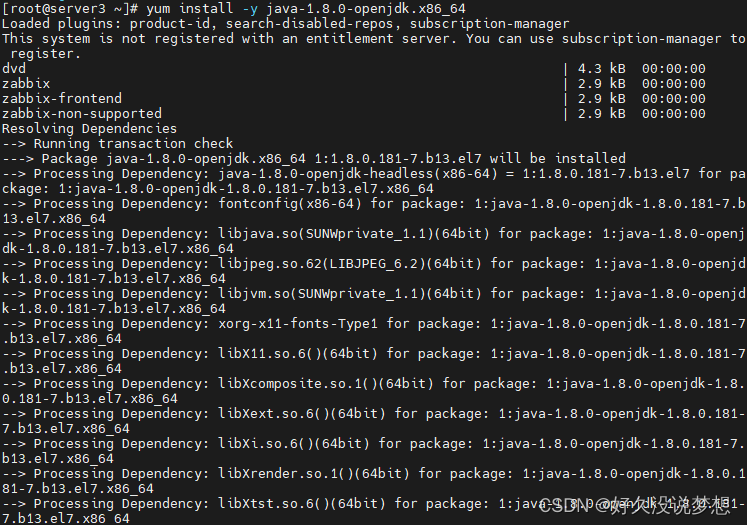
server3上安装java应用
[root@server3 ~]# yum install -y java-1.8.0-openjdk.x86_64
[root@server3 ~]# tar zxf apache-tomcat-7.0.37.tar.gz -C /usr/local/
[root@server3 ~]# cd /usr/local/
[root@server3 local]# ln -s apache-tomcat-7.0.37/ tomcat
[root@server3 local]# cd tomcat/
[root@server3 tomcat]# cd bin/
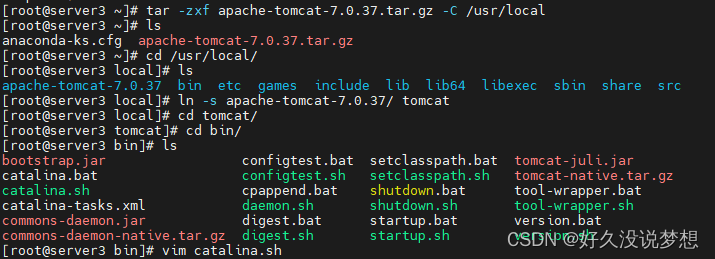
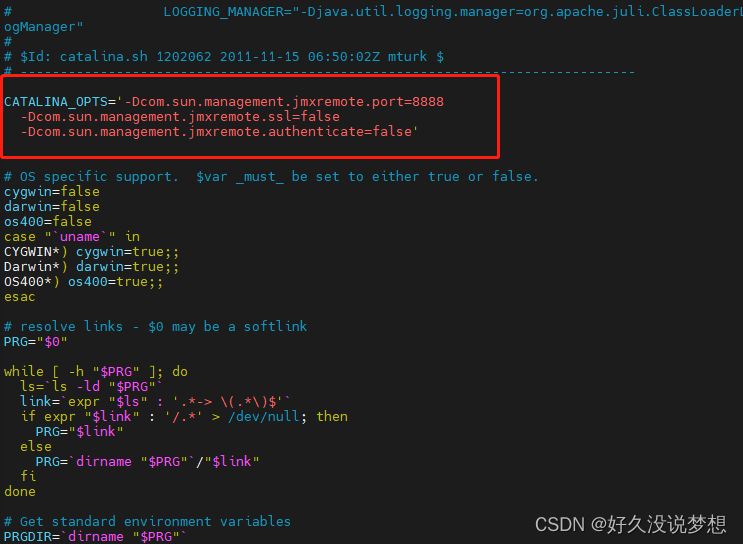
[root@server3 bin]# vim catalina.sh
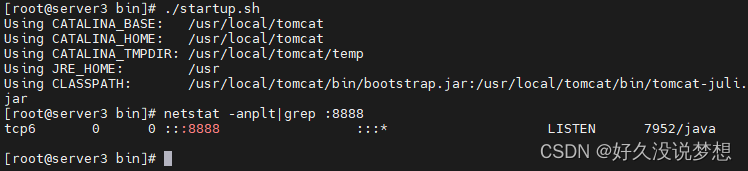
[root@server3 bin]# ./startup.sh
Using CATALINA_BASE: /usr/local/tomcat
Using CATALINA_HOME: /usr/local/tomcat
Using CATALINA_TMPDIR: /usr/local/tomcat/temp
Using JRE_HOME: /usr
Using CLASSPATH: /usr/local/tomcat/bin/bootstrap.jar:/usr/local/tomcat/bin/tomcat-juli.jar
[root@server3 bin]# netstat -anplt|grep :8888
tcp6 0 0 :::8888 :::* LISTEN 7952/java
安装zabbix-java-gateway
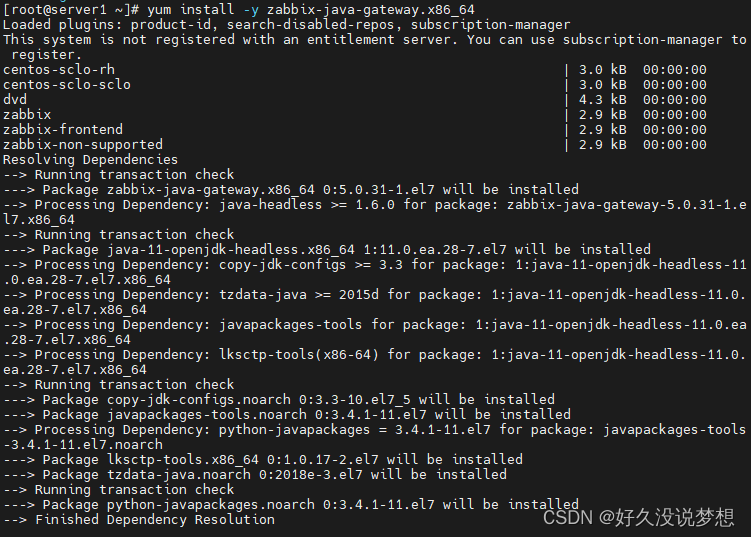
[root@server1 zabbix]# systemctl enable --now zabbix-java-gateway.service
[root@server1 zabbix]# netstat -antlp|grep :10052
tcp6 0 0 :::10052 :::* LISTEN 15393/java

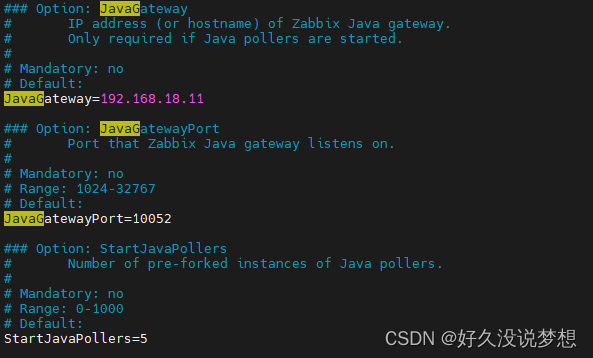
修改server配置
[root@server1 zabbix]# vim /etc/zabbix/zabbix_server.conf
...
JavaGateway=192.168.18.11
JavaGatewayPort=10052
StartJavaPollers=5
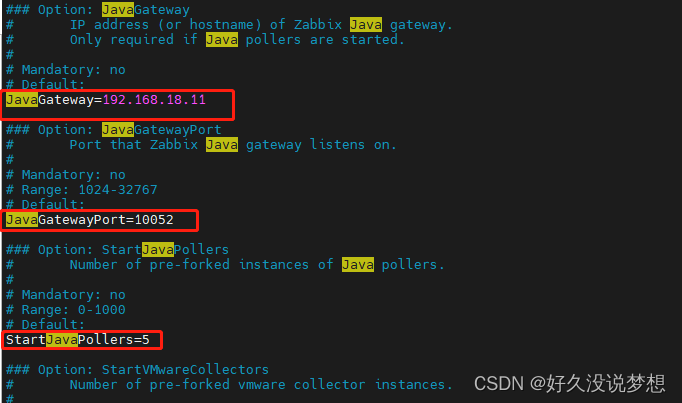
[root@server1 zabbix]# systemctl restart zabbix-server.service

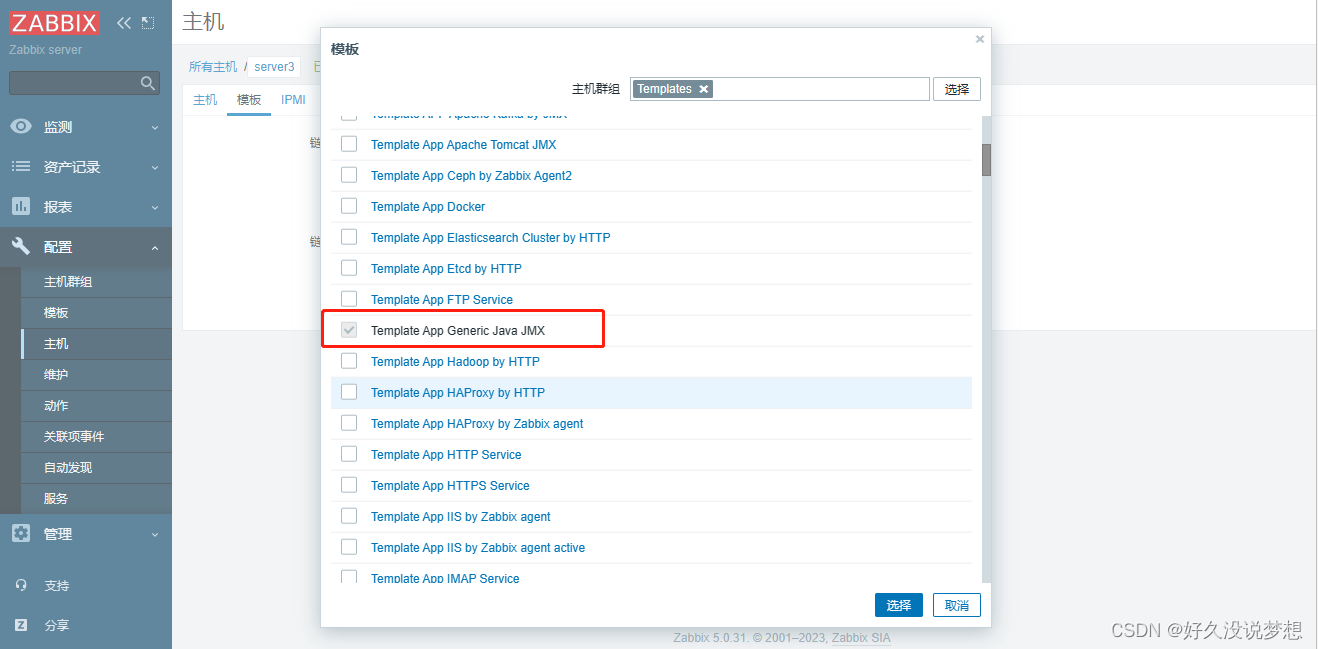
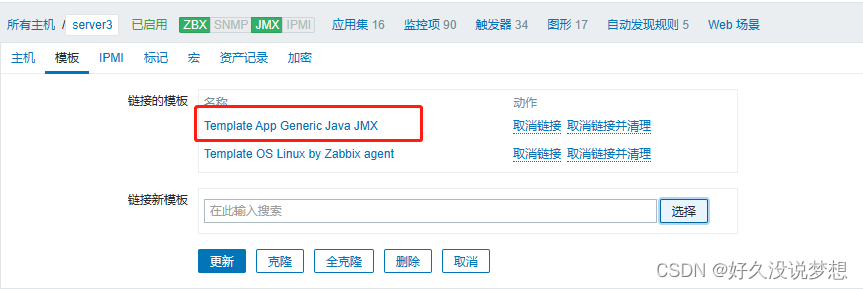
前端配置
添加jmx接口

关联模板
集成告警平台
注册用户:https://caweb.aiops.com/
避免报警冲突可以先关闭其他的
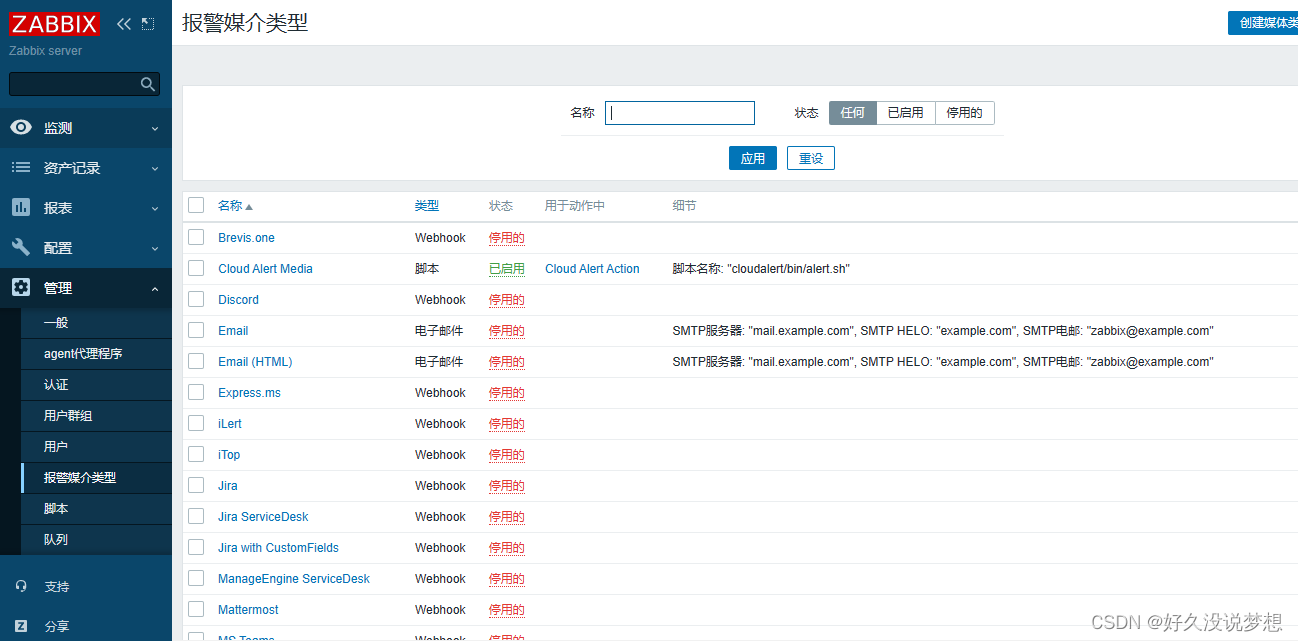
创建appkey

部署探针
[root@server1 ~]# cd /usr/lib/zabbix/alertscripts
[root@server1 alertscripts]# tar xf ca_zabbix_release-4.0.1.tar.gz
[root@server1 alertscripts]# cd cloudalert/bin

[root@server1 bin]# ./install.sh 3933d1b8860b422bb7da0af2fd8f0b23
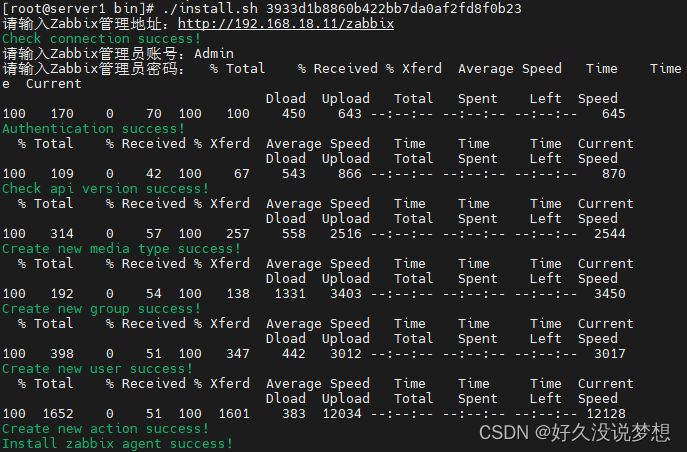
[root@server1 alertscripts]# chown zabbix.zabbix cloudalert/ -R

配置通知策略

停止agent服务
[root@server2 ~]# systemctl stop zabbix-agent.service

等待片刻后会触发报警,并发送到外部告警平台

可以在告警平台查看到完整到处理流程
[root@server2 ~]# systemctl start zabbix-agent.service

七、分布式监控
agent 主动方式
新建proxy节点,删除server2 agent作为proxy节点
[root@server2 ~]# systemctl disable --now zabbix-agent.service
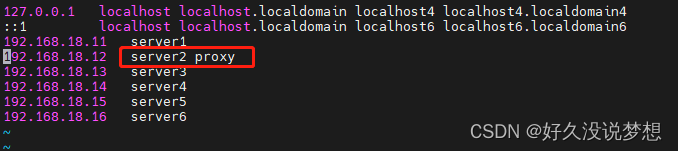
[root@server2 ~]# hostnamectl set-hostname proxy

[root@proxy ~]# vim /etc/hosts
192.168.56.12 server2 proxy
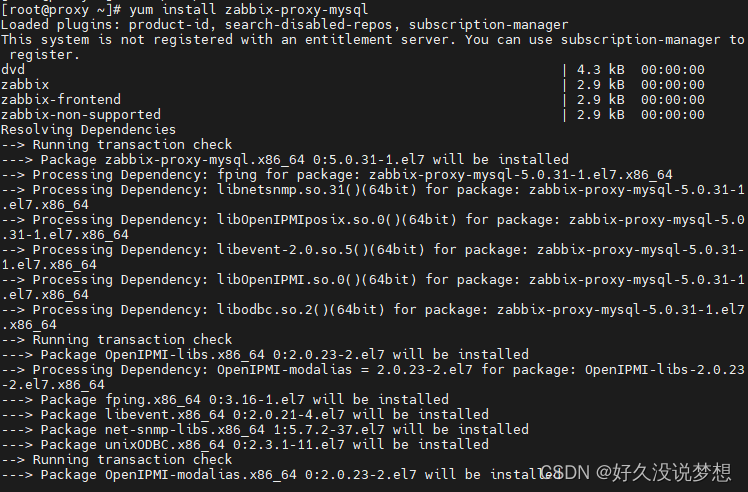
安装proxy软件
[root@proxy ~]# yum install zabbix-proxy-mysql
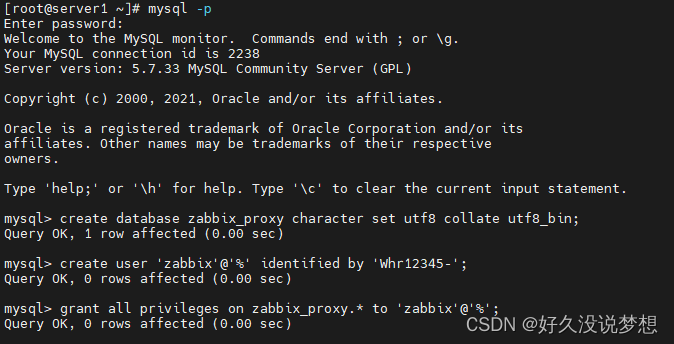
在server1上创建proxy数据库
[root@server1 ~]# mysql -p
mysql> create database zabbix_proxy character set utf8 collate utf8_bin;
Query OK, 1 row affected (0.00 sec)
mysql> create user 'zabbix'@'%' identified by 'Whr12345-';
Query OK, 0 rows affected (0.01 sec)
mysql> grant all privileges on zabbix_proxy.* to 'zabbix'@'%';
Query OK, 0 rows affected (0.00 sec)
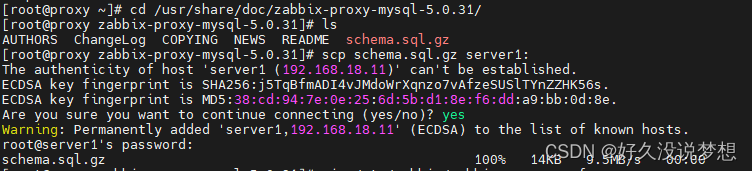
从proxy拷贝数据库文件
[root@proxy ~]# cd /usr/share/doc/zabbix-proxy-mysql-5.0.31/
[root@proxy zabbix-proxy-mysql-5.0.31]# scp schema.sql.gz server1:
导入proxy数据库
[root@server1 ~]# zcat schema.sql.gz | mysql -uzabbix -pYakexi+007 zabbix_proxy

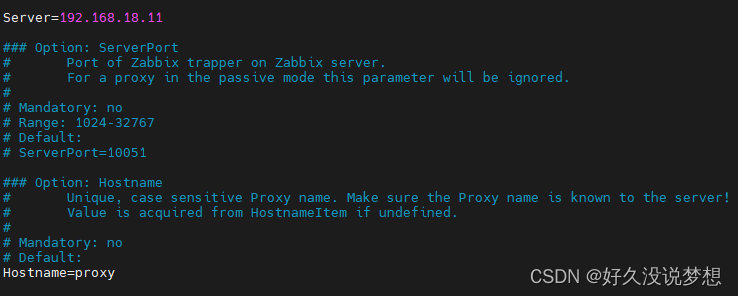
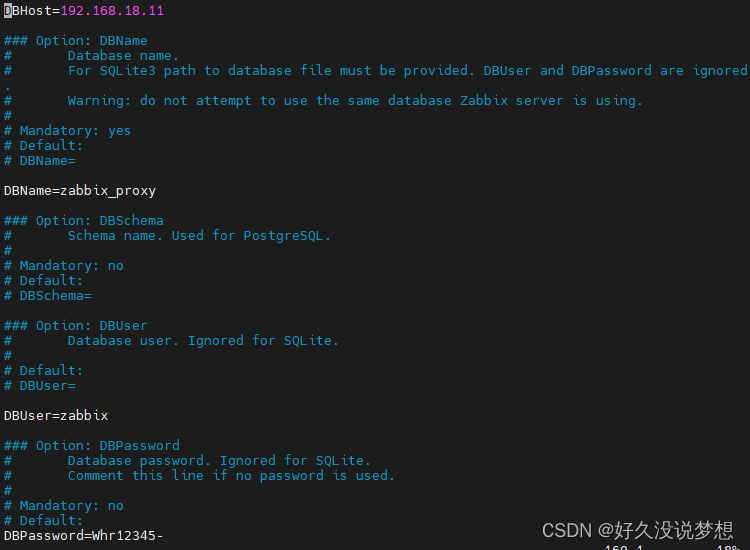
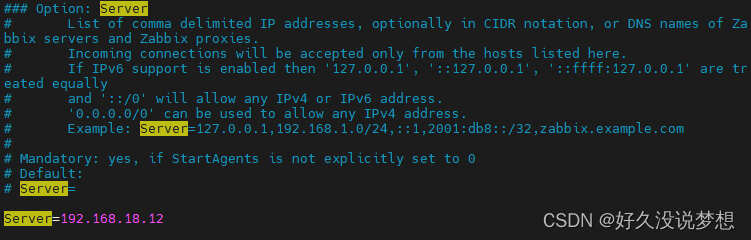
修改proxy配置
[root@proxy ~]# vim /etc/zabbix/zabbix_proxy.conf
Server=192.168.56.11 #指向zabbix_server
Hostname=proxy #主机名
DBHost=192.168.56.11 #proxy数据库配置
DBName=zabbix_proxy
DBUser=zabbix
DBPassword=Yakexi+007
JavaGateway=192.168.56.11 #jmx配置
JavaGatewayPort=10052
StartJavaPollers=5
[root@proxy ~]# systemctl restart zabbix-proxy.service
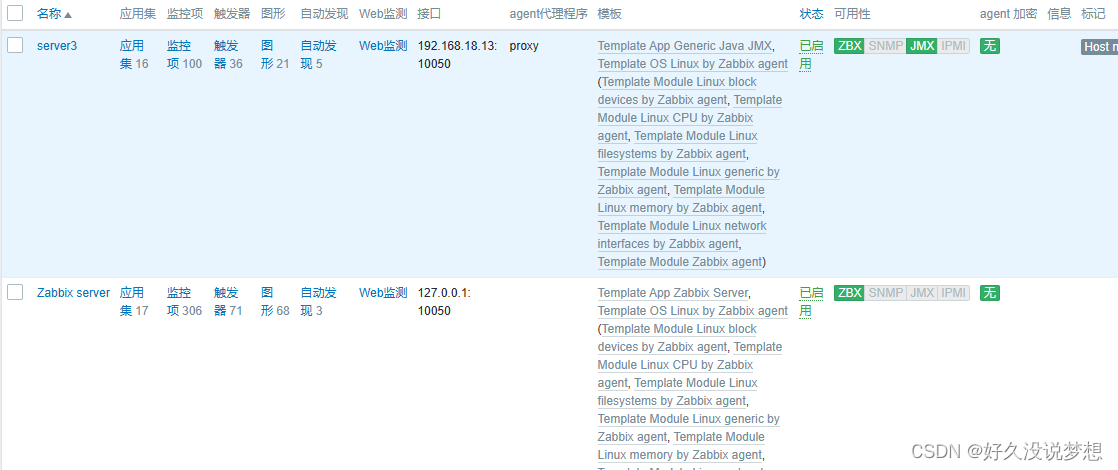
创建proxy

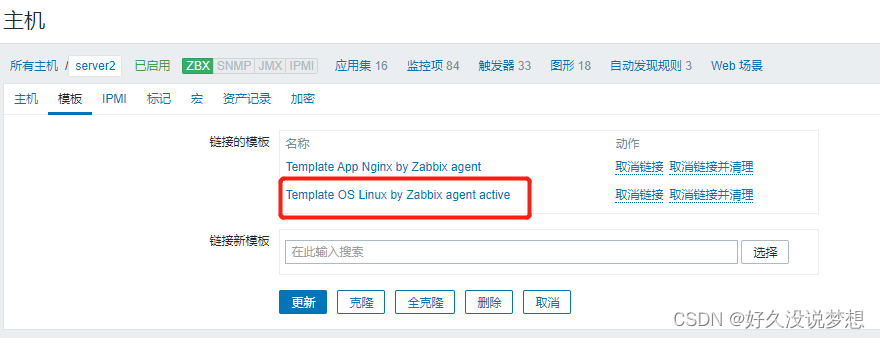
为主机配置代理
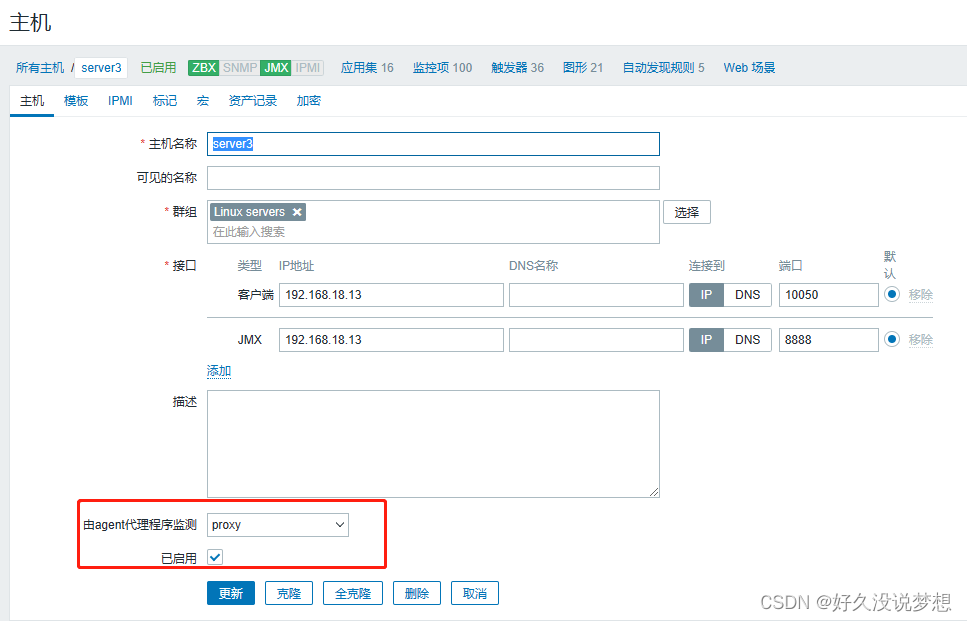
再重启proxy服务
[root@proxy ~]# systemctl restart zabbix-proxy.service

修改agent配置,指向proxy地址
[root@server3 ~]# vim /etc/zabbix/zabbix_agentd.conf
Server=192.168.56.12
ServerActive=192.168.56.12
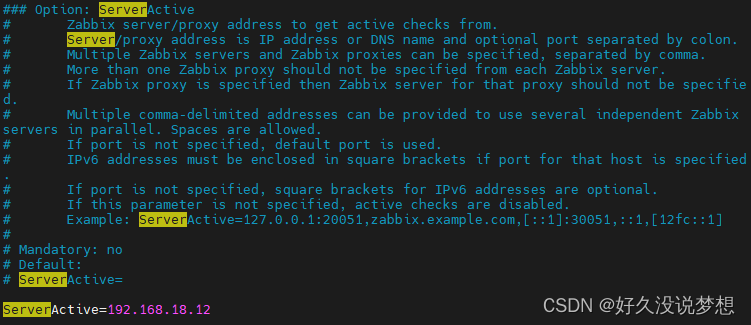
[root@server3 ~]# systemctl restart zabbix-agent.service
查看日志,没有报错就表示成功
[root@server3 ~]# cat /var/log/zabbix/zabbix_agentd.log
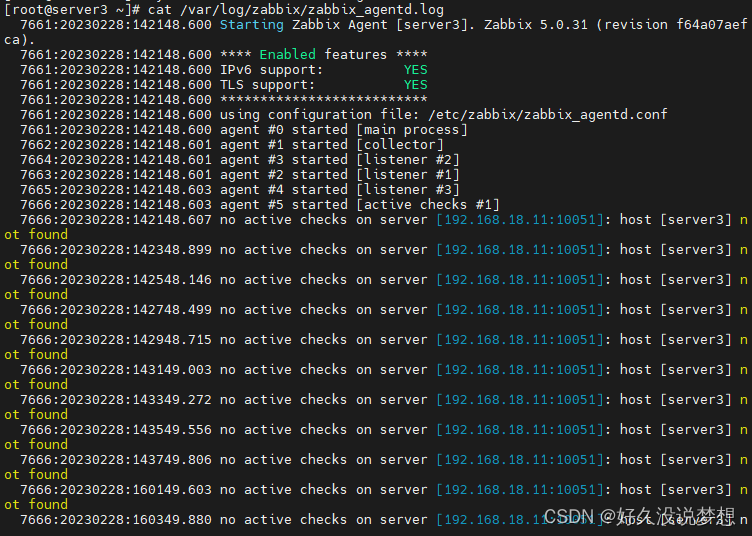
如果agent日志中出现类似的报错,说明proxy还没有完全同步server端数据,需要再次重启proxy服务
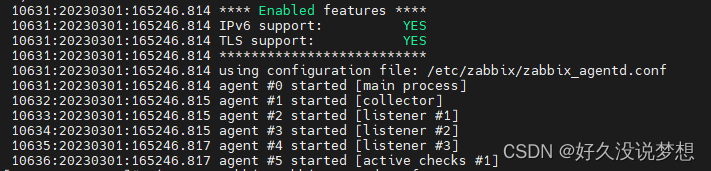
最终配置完毕后,逐渐监控状态也是可用的

总结
本章详细讲解了zabbix企业级监控平台从部署到,适用于各个场景的服务监控。