SpringMVC文件上传、下载、国际化配置
Java知识点总结:想看的可以从这里进入
目录
- 3.6、文件上传、下载
- 3.6.1、文件上传
- 3.6.2、文件下载
- 3.7、国际化配置
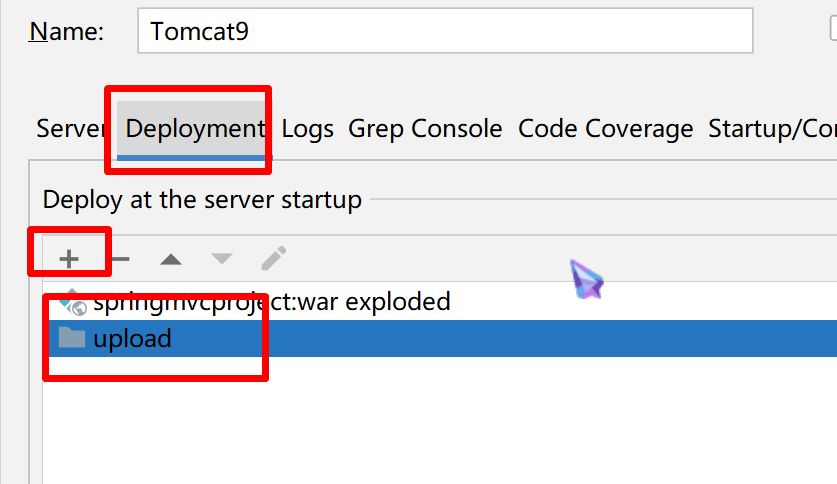
3.6、文件上传、下载
3.6.1、文件上传
form 表单想要具有文件上传功能,其必须满足以下 3 个条件。
- form 表单的 method 属性必须设置为 post。
- form 表单的 enctype 属性设置为 multipart/form-data。
- 至少提供一个 type 属性为 file 的 input 输入框。
在SpringMVC 中为我们提供了文件解析器,来实现上传文件的功能,MultipartResolver 本身是一个接口,我们需要通过它的实现类来完成对它的实例化工作。
| 实现类 | 说明 | 依赖 | 支持的 Servlet 版本 |
|---|---|---|---|
| StandardServletMultipartResolver | Servlet 内置的上传功能。 | 不需要第三方 JAR 包的支持。 | 仅支持 Servlet 3.0 及以上版本 |
| CommonsMultipartResolver | 借助 Apache 的 commons-fileupload 来完成具体的上传操作。 | 需要 Apache 的 commons-fileupload 等 JAR 包的支持。 | 不仅支持 Servlet 3.0 及以上版本,还可以在比较旧的 Servlet 版本中使用。 |
commons-fileupload commons-fileupload 1.3.1
commons-io commons-io 2.8.0
CommonsMultipartResolver我们在学习Servlet组件的时候使用过,它在springMVC中使用时需要配置文件解析器,其中multipartResolver这个名字是固定的一旦更改,就无法完成文件的解析和上传工作。
在使用时直接向Controller的方法中传入参数即可 MultipartFile file即可使用:
@RequestMapping("")
public void multipartFileTest(MultipartFile file){}
| 内部方法 | 作用 |
|---|---|
| byte[] getBytes() | 以字节数组的形式返回文件的内容。 |
| String getContentType() | 返回文件的内容类型。 |
| InputStream getInputStream() | 返回一个 input 流,从中读取文件的内容。 |
| String getName() | 返回请求参数的名称。 |
| String getOriginalFillename() | 返回客户端提交的原始文件名称。 |
| long getSize() | 返回文件的大小,单位为字节。 |
| boolean isEmpty() | 判断被上传文件是否为空。 |
| void transferTo(File destination) | 将上传文件保存到目标目录下。 |
使用Controller上传图片
@RequestMapping(value = "/uploadPhoto", method = RequestMethod.POST)
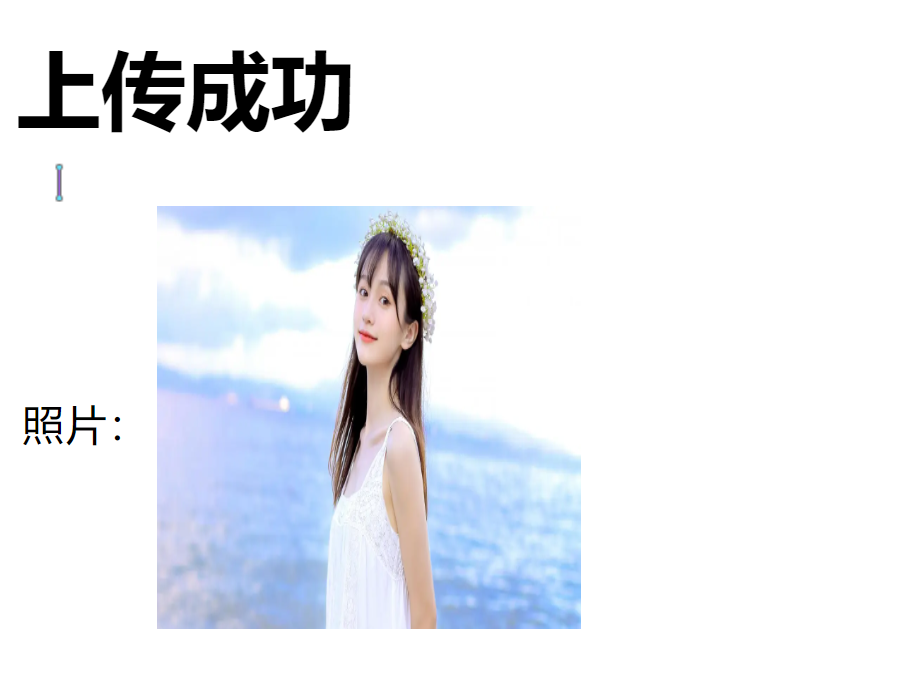
public String uploadPhoto(MultipartFile photo, HttpServletRequest request,Model model) {String realPath = request.getSession().getServletContext().getRealPath("/upload/");System.out.println(realPath);File fileDir = new File(realPath);if (!fileDir.exists()) {fileDir.mkdir();}String filename = photo.getOriginalFilename();System.err.println("正在上传的图片为:" + filename);String newFileName = UUID.randomUUID() + filename;try {//将文件保存指定目录photo.transferTo(new File(realPath + newFileName));model.addAttribute("message","上传成功");model.addAttribute("filename",newFileName);} catch (Exception e) {model.addAttribute("message","上传失败");e.printStackTrace();}return "page/success";
}
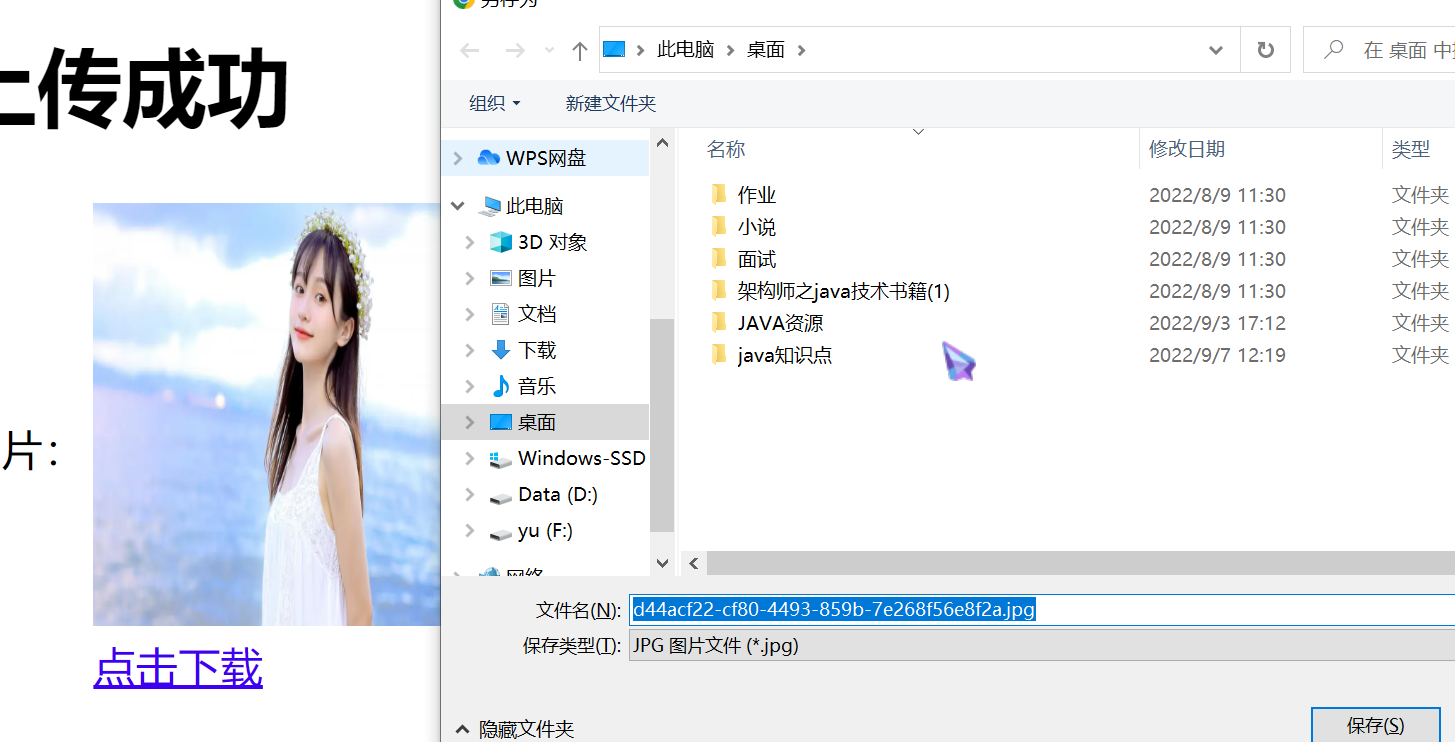
照片: ![]()
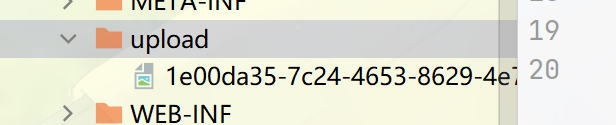
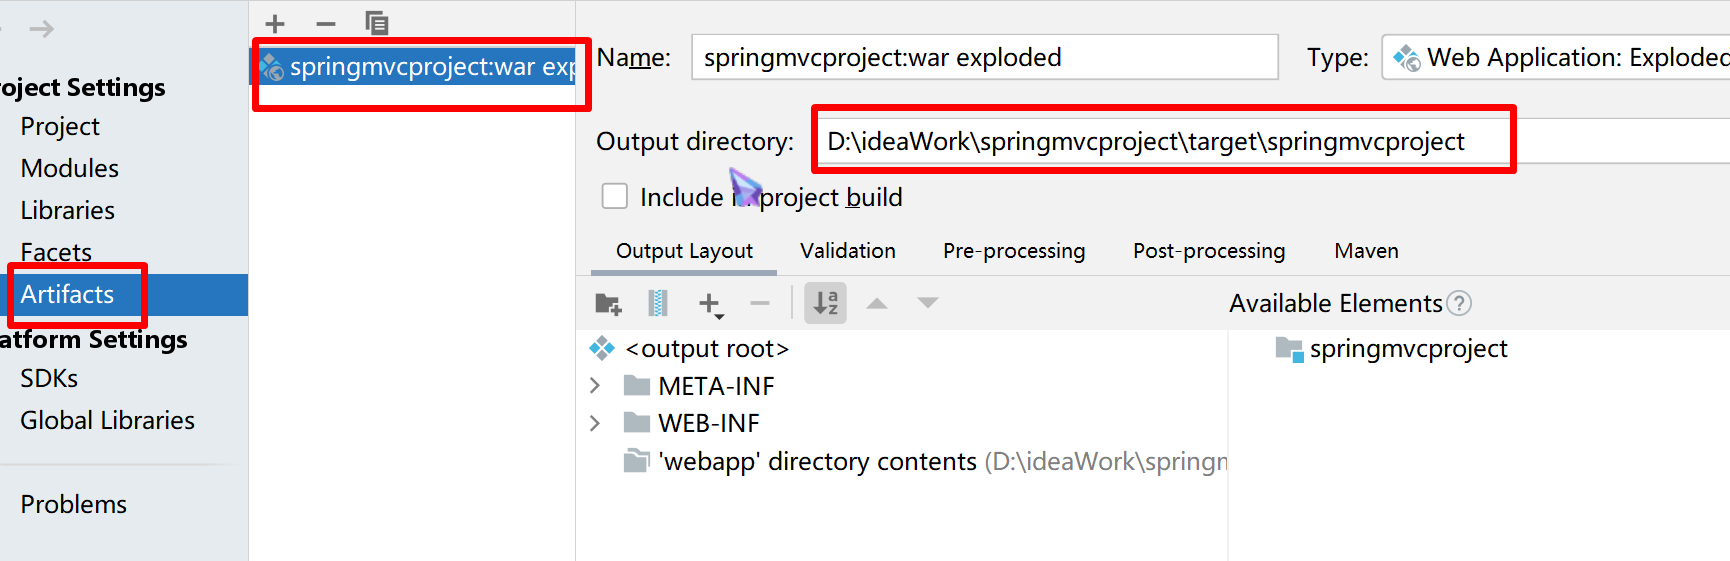
这里有一点要注意,如果使用的eclipse,那么使用request.getSession().getServletContext().getRealPath(“/upload/”),获取的就是部署到Tomcat的路径,可以直接获取,但是如果你使用的是Idea的话,它是把图片上传到了target这样一个文件夹内
如果想获取这个路径的图片可以通过tomcat设置一个虚拟的路径:
设置完成后,通过 http://localhost:8080/虚拟路径文件夹/文件名,即可获取上传的图片


3.6.2、文件下载
使用ResponseEntity实现下载文件的功能。
将上面上传的文件下载:
照片: ![]()
点击下载@RequestMapping("/downLoadFile")
public ResponseEntity downLoadFile(HttpServletRequest request, String fileName) throws IOException {//得到图片的实际路径String realPath = request.getSession().getServletContext().getRealPath("/upload/");realPath = realPath+fileName;//创建该图片的对象File file = new File(realPath);//将图片数据读取到字节数组中byte[] bytes = FileUtils.readFileToByteArray(file);//创建 HttpHeaders 对象设置响应头信息HttpHeaders httpHeaders = new HttpHeaders();//设置图片下载的方式和文件名称httpHeaders.setContentDispositionFormData("attachment", toUTF8String(fileName));httpHeaders.setContentType(MediaType.APPLICATION_OCTET_STREAM);return new ResponseEntity<>(bytes, httpHeaders, HttpStatus.OK);
}public String toUTF8String(String str) {StringBuffer sb = new StringBuffer();int len = str.length();for (int i = 0; i < len; i++) {// 取出字符中的每个字符char c = str.charAt(i);// Unicode码值为0~255时,不做处理if (c <= 255) {sb.append(c);} else { // 转换 UTF-8 编码byte b[];try {b = Character.toString(c).getBytes("UTF-8");} catch (UnsupportedEncodingException e) {e.printStackTrace();b = null;}// 转换为%HH的字符串形式for (int value : b) {int k = value;if (k < 0) {k &= 255;}sb.append("%" + Integer.toHexString(k).toUpperCase());}}}return sb.toString();
}

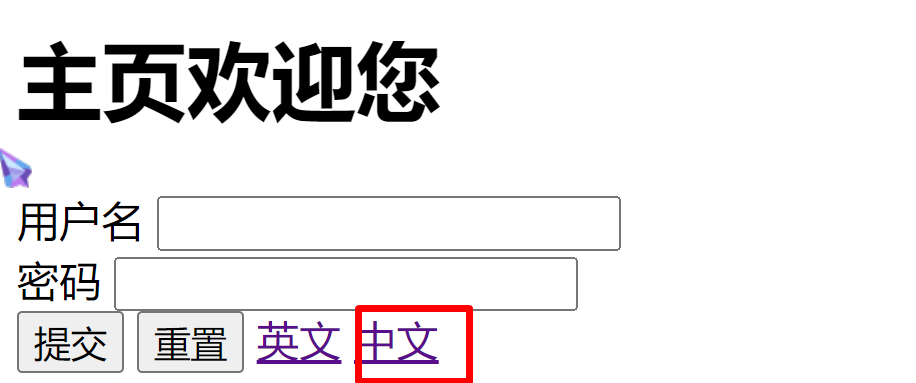
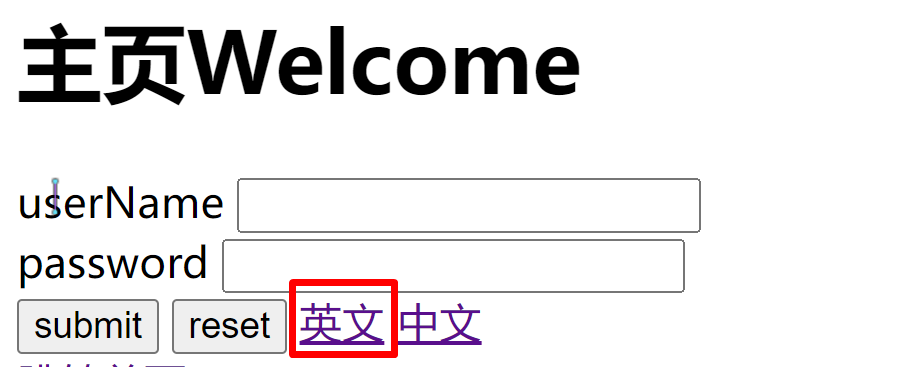
3.7、国际化配置
国际化(i18n)(internationalization的首末字符i和n,18为中间的字符数)是指软件开发时应该具备支持多种语言和地区的功能。也就是根据不同国家显示不同的语言(中国人阅读为汉语,美国人为英语,韩国人为韩语等等)。
在 Spring 项目中实现国际化,通常需要以下 4 步:
-
编写国际化资源文件:文件名格式为:基本名-语言代码-国家或地区代码,例如 messages_zh_CN.properties。
userName=用户名
password=密码
welcome=欢迎您
submit=提交
reset=重置userName=userName
password=password
welcome=Welcome
submit=submit
reset=reset
写完之后IDEA会自动归类这种文件

-
在Spring MVC xml配置文件进行配置
-
在页面中获取国际化内容;
-
编写控制器方法手动切换语言。
@Controller
public class I18nController  {@Autowiredprivate ResourceBundleMessageSource messageSource;@RequestMapping("/localeChange")public String localeChange(Locale locale) {String userName = messageSource.getMessage("userName", null, locale);String password = messageSource.getMessage("password", null, locale);String submit = messageSource.getMessage("submit", null, locale);String reset = messageSource.getMessage("reset", null, locale);return "index";}
}