Linux stream9 mysql-8.0.28-el7-x86_64.tar包的安装记录
CentOS7安装 mysql-8.0.28-el7-x86_64记录,
最近想尝试下最新的stream9安装MySQL8.0,然后试试就试试🤣
但是发现stream9提供的都是rpm包,平时我大多tar包部署,就有点不习惯,就找到之前的老版本的tar包,开始尝试。
1. 下载
MySQL8.0.28
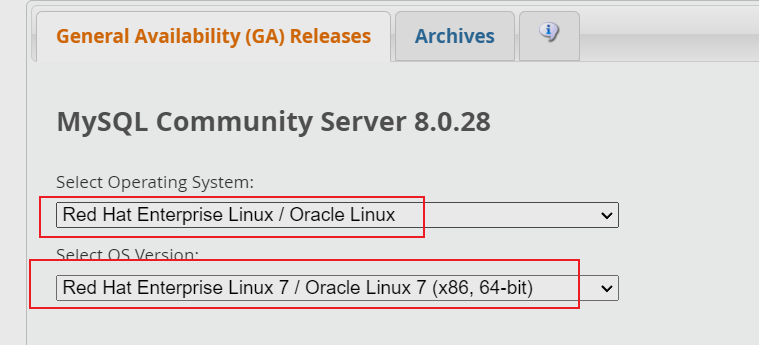
补图
(mysql-8.0.28-el7-x86_64.tar.gz 和 mysql-8.0.28-el7-x86_64.tar都行)
(以mysql-8.0.28-el7-x86_64.tar.gz为例)
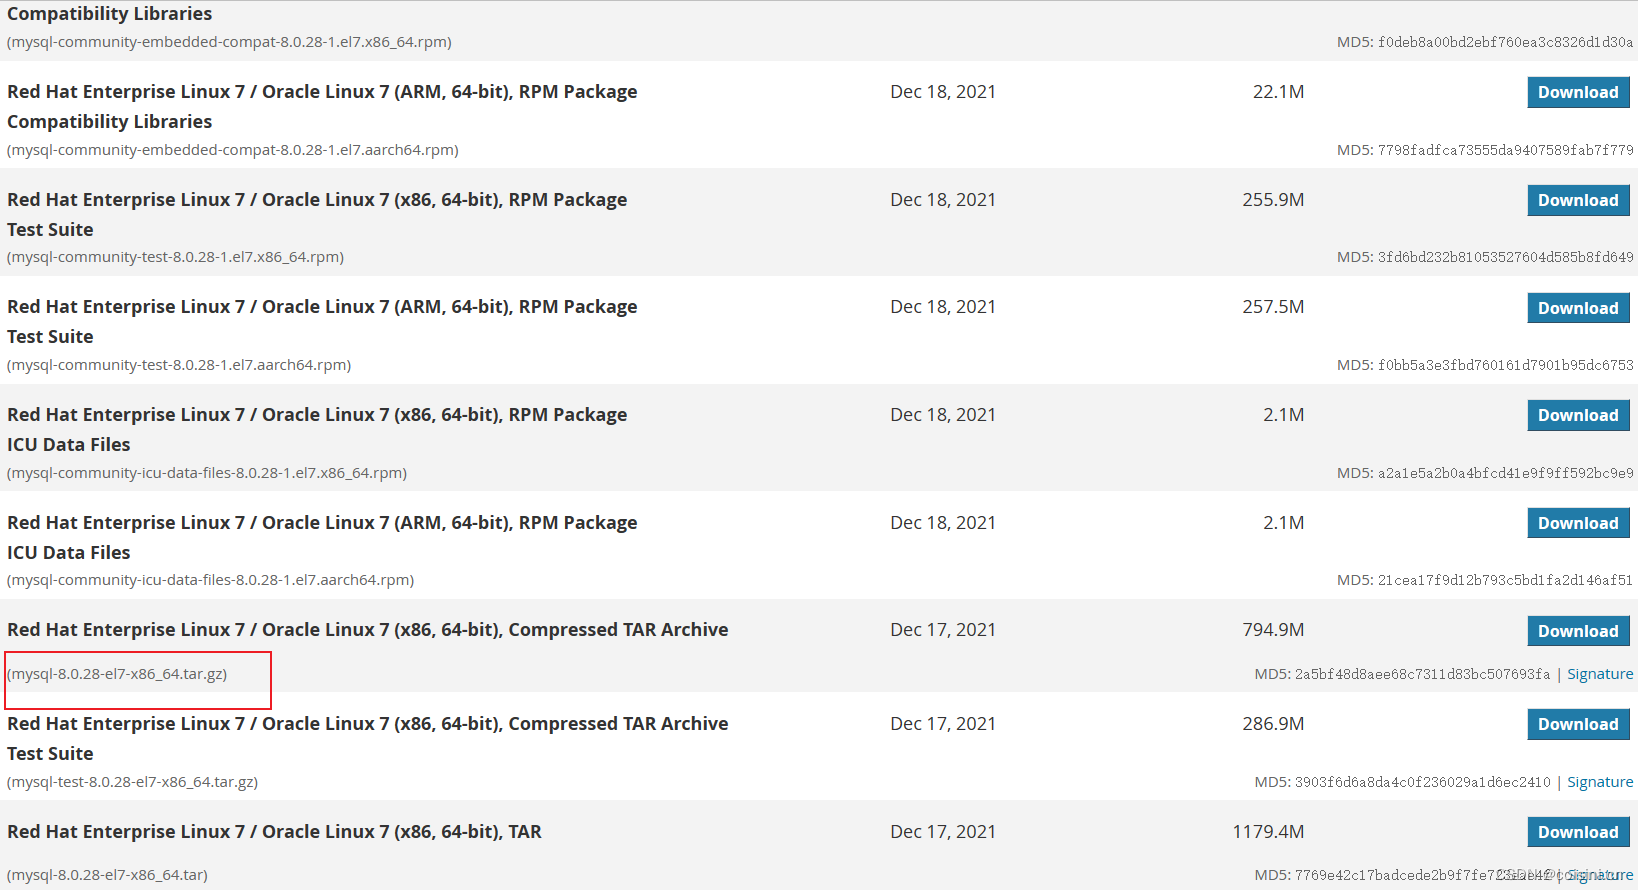
补图

右击下载到本地再传,
或者 在线下载(注意版本号)
wget https://dev.mysql.com/get/Downloads/MySQL-8.0/mysql-8.0.31-el7-x86_64.tar.gz
等下载完(推荐先更换yum源再下载,快很多,CentOS7换源看我这篇文章 点我跳转)

2. 解压
我这放在 /usr/local/ 目录下:
tar包先拆分
tar -xvf mysql-8.0.28-el7-x86_64.tar
再解压
tar -zxvf mysql-8.0.28-el7-x86_64.tar.gz
3. 重命名
[root@VM-0-2-centos local]# mv mysql-8.0.28-el7-x86_64/ mysql
4. 创建存储数据文件
[root@VM-0-2-centos local]# mkdir mysql/data
以下两个文件在CentOS7的时候,倒是不用创建,stream9 提示文件不存在,所有先创建好
[root@VM-0-2-centos local]# mkdir /etc/init.d
[root@VM-0-2-centos local]# mkdir /etc/init.d/mysql
5. 设置用户组并赋权
[root@VM-0-2-centos local]# groupadd mysql
[root@VM-0-2-centos local]# useradd -r -g mysql mysql
[root@VM-0-2-centos local]# chown -R mysql:mysql /usr/local/mysql/
[root@VM-0-2-centos local]# chmod -R 755 /usr/local/mysql
6. 初始化MySQL
进入MySQL的bin目录
[root@VM-0-2-centos local]# cd mysql/bin
初始化 (注意root@localhost:后面生成的随机密码)
[root@VM-0-2-centos bin]# ./mysqld --initialize --user=mysql --datadir=/usr/local/mysql/data --basedir=/usr/local/mysql
./mysqld: error while loading shared libraries: libnuma.so.1: cannot
open shared object file: No such file or directory报错,缺依赖::::
yum install -y libaio
yum -y install numactl再初始化
./mysqld --initialize --user=mysql --datadir=/usr/local/mysql/data --basedir=/usr/local/mysql

7. 配置文件
[root@VM-0-2-centos bin]# vi /etc/my.cnf
配置文件修改为以下内容:
[client]
#password       = your_password
port               = 3306
socket          = /usr/local/mysql/data/mysql.sock
default-character-set = utf8mb4[mysql]
default-character-set = utf8mb4[mysqld]
character-set-client-handshake = FALSE
character-set-server = utf8mb4
collation-server = utf8mb4_general_ci
init_connect = 'SET NAMES utf8mb4'port            = 3306
socket          = /usr/local/mysql/data/mysql.sock
skip-external-locking
key_buffer_size = 16M
max_allowed_packet = 1M
table_open_cache = 64
sort_buffer_size = 512K
net_buffer_length = 8K
read_buffer_size = 256K
read_rnd_buffer_size = 512K
myisam_sort_buffer_size = 8M
datadir = /usr/local/mysql/data[mysqldump]
quick
max_allowed_packet = 16M[mysql]
no-auto-rehash[myisamchk]
key_buffer_size = 20M
sort_buffer_size = 20M
read_buffer = 2M
write_buffer = 2M[mysqlhotcopy]
interactive-timeout
8. 启动MySQL
/usr/local/mysql/support-files/mysql.server start
关闭防火墙
systemctl stop firewalld
开放端口
firewall-cmd --zone=public --add-port=3306/tcp --permanent
–zone # 作用域
–add-port=3306/tcp # 添加端口,格式为:端口/通讯协议
–permanent # 永久生效,没有此参数重启后失效
9. 设置软连接,并重启MySQL
[root@VM-0-2-centos bin]# ln -s /usr/local/mysql/support-files/mysql.server /etc/init.d/mysql
[root@VM-0-2-centos bin]# ln -s /usr/local/mysql/bin/mysql /usr/bin/mysql
[root@VM-0-2-centos bin]# ln -s /usr/local/mysql/mysql.sock /var/mysql.sock
[root@VM-0-2-centos bin]# service mysql restart
10. 登录并更改密码 (重点来了!)
[root@coisini bin]# mysql -u root -p
这两个文件找不到,但都在 /usr/lib64/ 下有.6版本的
报错1:
mysql: error while loading shared libraries:libncurses.so.5: cannot open shared object file: No such file or directory
报错2:
mysql: error while loading shared libraries:libtinfo.so.5: cannot open shared object file: No such file or directory
查找:
[root@coisini bin]# find / -name 'libncurses*'
/usr/lib64/libncurses.so.6
/usr/lib64/libncurses.so.6.2
/usr/lib64/libncursesw.so.6
/usr/lib64/libncursesw.so.6.2
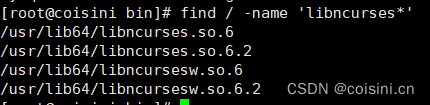
在/usr/lin64中找到了 libncurses.so.6.2( 不同机器版本号可能不同,需要注意),然后创建一个软连接ln -s 文件路径 快捷方式路径指向它
解决方案: 建立软链接
(libncurses 和 libtinfo 两个)(注意.so.6.*版本)
ln -s /usr/lib64/libncurses.so.6.2 /usr/lib64/libncurses.so.5
ln -s /usr/lib64/libtinfo.so.6.2 /usr/lib64/libtinfo.so.5
再 mysql -u root -p 就可以了

修改密码
alter user 'root'@'localhost' identified by '123456';
11.开放远程连接
use mysql;
update user set user.Host='%' where user.User='root';
flush privileges;
12. 连接工具测试连接MySQL

13.如果需要再次修改密码的话
第11步开放远程连接把表中的 localhost 改为 % 了,第二次修改密码替换一下
alter user 'root'@'%' identified by '123456';
flush privileges;
14.开机自启配置
添加服务,发现chkconfig 没了, 用yum也安装不了…🤬
尝试使用 systemctl start 服务名称 启动
14.1 进入系统脚本服务目录:
cd /etc/systemd/system/
14.2 编辑文件:
vi mysql8.service
14.3 添加内容:
[Unit]
Description=mysql8
After=network.target remote-fs.target nss-lookup.target[Service]
Type=forking
ExecStart=/etc/init.d/mysqld/mysql8.server start
#ExecReload=/etc/init.d/mysqld/mysql8.server restart
#ExecStop=/etc/init.d/mysqld/mysql8.server stop
#PrivateTmp=true[Install]
WantedBy=multi-user.target
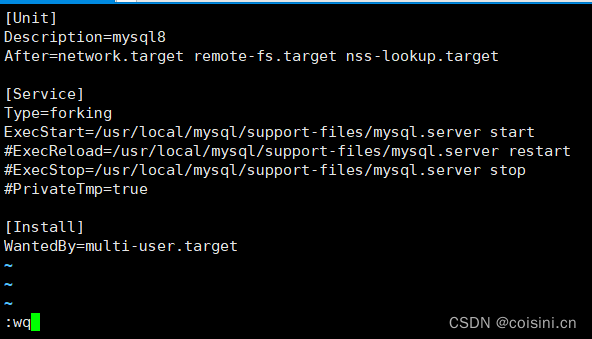
14.4 按ESC :wq保存并退出
14.5 给脚本赋权:
chmod 754 mysql8.service
14.6 设置开机自启:
systemctl enable mysql8.service
相关命令:
开启命令:
systemctl start mysql8.service
停止命令:
systemctl top mysql8.service
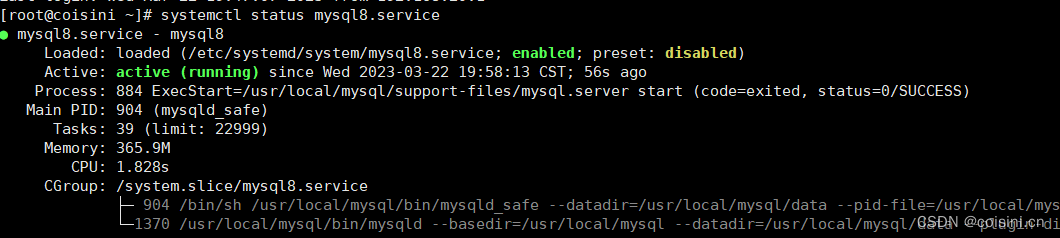
查看状态:
systemctl status mysql8.service
可以重启电脑,看看是否生效
reboot
systemctl status mysql8.service
查看mysql服务是否开机自启。
搞定😁感谢阅览,暂时到这,结束。
下回有时间弄弄rpm包安装MySQL…