k8s--Kubernetes存储--Configmap配置管理
创始人
2024-06-02 17:07:24
0次
文章目录
- 一、环境的清理
- 二、Configmap配置管理
- 1. 使用字面值创建
- 2.通过文件创建
- 3.通过目录创建
- 4.通过yaml文件创建
- 三、如何使用configmap
- 1.使用configmap设置环境变量
- 2.使用conigmap设置命令行参数
- 3.通过数据卷使用configmap
- 4.configmap热更新
一、环境的清理
##删除namespace
[root@server2 ingress]# kubectl get ns   ##查看所有namespace,并删除
[root@server2 ingress]# kubectl delete pod --all -n demo --force ##先删除里面pod在删除ns会快一点
[root@server2 ingress]# kubectl delete ns demo
##删除pod
[root@server2 ingress]# kubectl delete pod --all -n test --force
[root@server2 ingress]# kubectl delete ns test
[root@server2 ingress]# kubectl delete pod nginx --force
[root@server2 ingress]# kubectl delete deployments.apps deployment
[root@server2 ingress]# kubectl delete pod demo --force
##删除服务
[root@server2 ingress]# kubectl get svc
[root@server2 ingress]# kubectl delete svc nginx-svc
##删除ingress服务
[root@server2 ingress]# kubectl delete ingress ingress-demo ## 删除网络策略
[root@server2 ingress]# kubectl delete networkpolicies. --all
二、Configmap配置管理
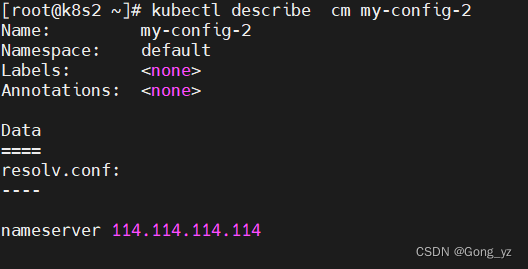
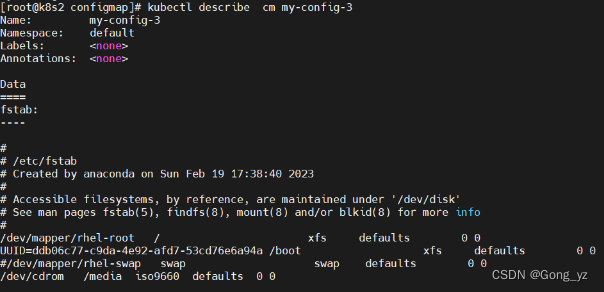
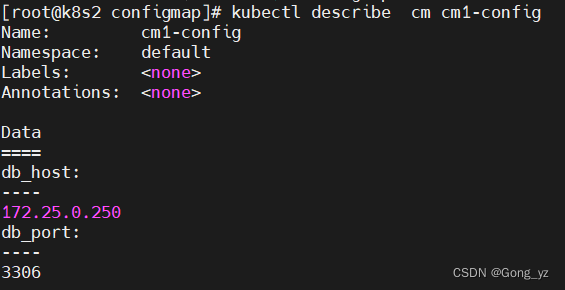
Configmap用于保存配置数据,以键值对形式存储。configMap 资源提供了向 Pod 注入配置数据的方法。旨在让镜像和配置文件解耦,以便实现镜像的可移植性和可复用性。 典型的使用场景: 1.填充环境变量的值2.设置容器内的命令行参数3.填充卷的配置文件 ##使用较多- 创建ConfigMap的方式有4种:1.使用字面值创建2.使用文件创建3.使用目录创建4.编写configmap的yaml文件创建- 1.使用字面值创建$ kubectl create configmap my-config --from-literal=key1=config1 --from-literal=key2=config2- 2.使用文件创建 $ kubectl create configmap my-config-2 --from-file=/etc/resolv.confkey的名称是文件名称,value的值是这个文件的内容- 3.使用目录创建$ kubectl create configmap my-config-3 --from-file=test目录中的文件名为key,文件内容是value- 4.编写configmap的yaml文件$ vim cm1.yamlapiVersion: v1kind: ConfigMapmetadata:name: cm1-configdata:db_host: "172.25.0.250"db_port: "3306"$ kubectl create -f cm1.yaml
1. 使用字面值创建
[root@k8s2 configmap]# kubectl create configmap my-config --from-literal=key1=config1 --from-literal=key2=config2
[root@k8s2 configmap]# kubectl get cm
NAME               DATA   AGE
kube-root-ca.crt   1      5d23h
my-config          2      4s
[root@k8s2 configmap]# kubectl describe cm my-config
Name:         my-config
Namespace:    default
Labels:
Annotations:  Data
====
key2:
----
config2
key1:
----
config1
2.通过文件创建
[root@k8s2 configmap]# kubectl create configmap my-config-2 --from-file=/etc/resolv.conf
3.通过目录创建
[root@k8s2 configmap]# mkdir test
[root@k8s2 configmap]# cp /etc/passwd test/
[root@k8s2 configmap]# cp /etc/fstab  test/
[root@k8s2 configmap]# ls test/
fstab  passwd
[root@k8s2 configmap]# kubectl create configmap my-config-3 --from-file=test
4.通过yaml文件创建
[root@k8s2 configmap]# vim cm1.yaml
apiVersion: v1
kind: ConfigMap
metadata:name: cm1-config
data:db_host: "172.25.0.250"db_port: "3306"[root@k8s2 configmap]# kubectl apply -f cm1.yaml
三、如何使用configmap
如何使用configmap:1.通过环境变量的方式直接传递给pod 2.通过在pod的命令行下运行的方式 3.作为volume的方式挂载到pod内 ##此方式最常用
1.使用configmap设置环境变量
[root@k8s2 configmap]# vim pod1.yaml
apiVersion: v1
kind: Pod
metadata:name: pod1
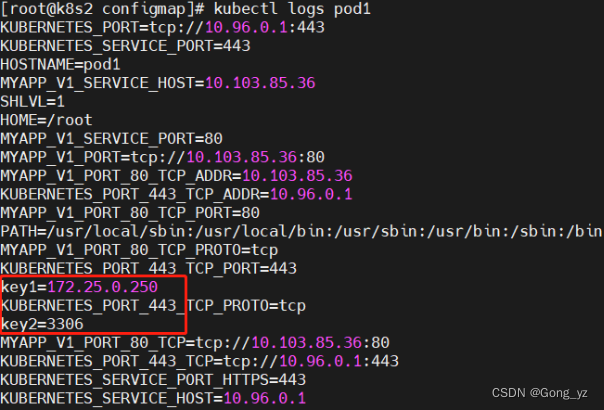
spec:containers:- name: pod1image: busyboxcommand: ["/bin/sh", "-c", "env"]env:- name: key1valueFrom:configMapKeyRef:name: cm1-configkey: db_host- name: key2valueFrom:configMapKeyRef:name: cm1-configkey: db_portrestartPolicy: Never[root@k8s2 configmap]# kubectl apply -f pod1.yaml
[root@k8s2 configmap]# kubectl delete  pod pod1[root@k8s2 configmap]# vim pod2.yaml
apiVersion: v1
kind: Pod
metadata:name: pod2
spec:containers:- name: pod2image: busyboxcommand: ["/bin/sh", "-c", "env"]envFrom:- configMapRef:name: cm1-configrestartPolicy: Never[root@k8s2 configmap]# kubectl apply -f pod2.yaml
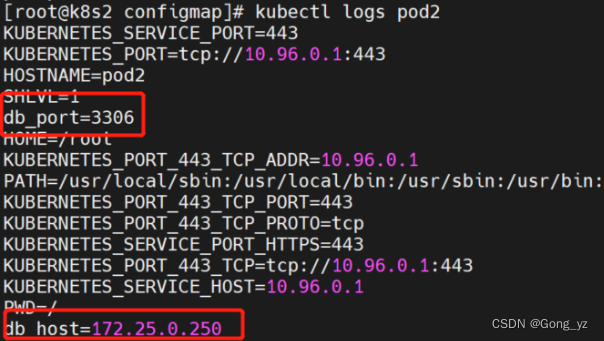
[root@k8s2 configmap]# kubectl delete pod pod2
2.使用conigmap设置命令行参数
[root@k8s2 configmap]# vim pod3.yaml
apiVersion: v1
kind: Pod
metadata:name: pod3
spec:containers:- name: pod3image: busyboxcommand: ["/bin/sh", "-c", "echo $(db_host) $(db_port)"]envFrom:- configMapRef:name: cm1-configrestartPolicy: Never[root@k8s2 configmap]# kubectl apply -f pod3.yaml[root@k8s2 configmap]# kubectl logs  pod3
172.25.0.250 3306[root@k8s2 configmap]# kubectl delete  pod pod3
3.通过数据卷使用configmap
[root@k8s2 configmap]# vim pod4.yaml
apiVersion: v1
kind: Pod
metadata:name: pod4
spec:containers:- name: pod4image: busyboxcommand: ["/bin/sh", "-c", "cat /config/db_host"]volumeMounts:- name: config-volumemountPath: /configvolumes:- name: config-volumeconfigMap:name: cm1-configrestartPolicy: Never
[root@k8s2 configmap]# kubectl apply -f pod4.yaml
[root@k8s2 configmap]# kubectl logs  pod4
172.25.0.250[root@k8s2 configmap]# kubectl delete pod pod4
4.configmap热更新
[root@k8s2 configmap]# vim nginx.conf
server {listen 8000;server_name _;location / {root /usr/share/nginx/html;index index.html index.htm;}
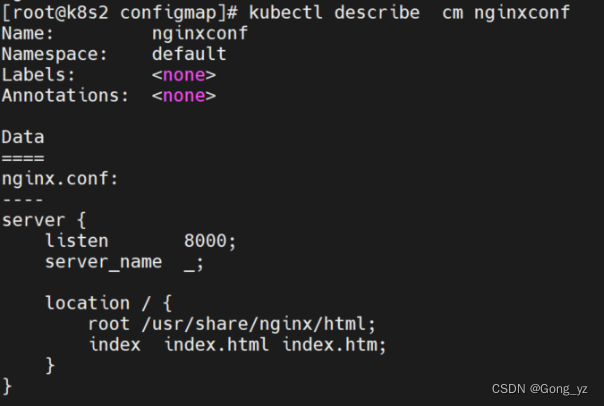
}[root@k8s2 configmap]# kubectl create configmap nginxconf --from-file=nginx.conf
[root@k8s2 configmap]# vim my-nginx.yaml
apiVersion: apps/v1
kind: Deployment
metadata:name: my-nginx
spec:replicas: 1selector:matchLabels:app: nginxtemplate:metadata:labels:app: nginxspec:containers:- name: nginximage: nginxvolumeMounts:- name: config-volumemountPath: /etc/nginx/conf.dvolumes:- name: config-volumeconfigMap:name: nginxconf[root@k8s2 configmap]# kubectl apply -f my-nginx.yaml
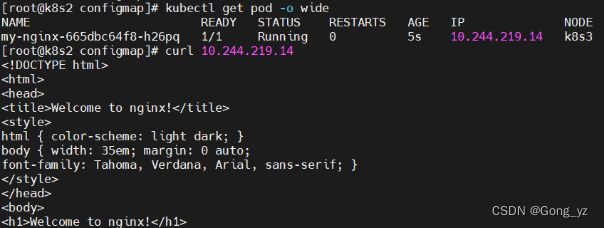
[root@k8s2 configmap]# kubectl get pod -o wide
NAME READY STATUS RESTARTS AGE IP NODE NOMINATED NODE READINESS GATES
my-nginx-665dbc64f8-gps5w 1/1 Running 0 8s 10.244.219.13 k8s3
[root@k8s2 configmap]# kubectl exec my-nginx-665dbc64f8-gps5w -- cat /etc/nginx/conf.d/nginx.conf
server {listen 8000;server_name _;location / {root /usr/share/nginx/html;index index.html index.htm;}
}[root@k8s2 configmap]# curl 10.244.219.13:8000
Welcome to nginx!
Welcome to nginx!
...
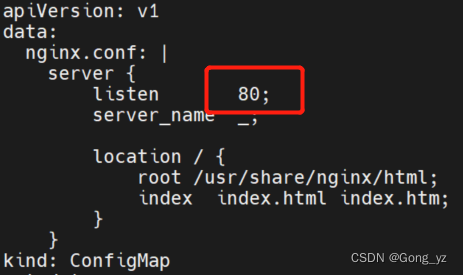
编辑cm,修改端口
[root@k8s2 configmap]# kubectl edit cm nginxconf
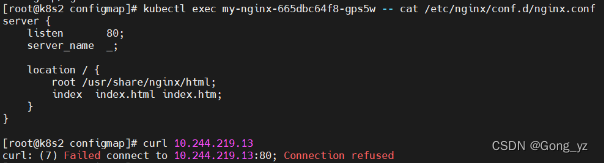
修改cm后,过上几秒配置信息会同步到容器,但是容器内运行的服务并不会加载生效,需要手动刷新
方式一:(推荐)
[root@k8s2 configmap]# kubectl delete  pod my-nginx-665dbc64f8-gps5w方式二:(手动触发版本更新,会新建一个replicaset)
[root@k8s2 configmap]# kubectl patch deployments.apps my-nginx --patch '{"spec": {"template": {"metadata": {"annotations": {"version/config": "20230312"}}}}}'
相关内容
热门资讯
保存时出现了1个错误,导致这篇...
当保存文章时出现错误时,可以通过以下步骤解决问题:查看错误信息:查看错误提示信息可以帮助我们了解具体...
汇川伺服电机位置控制模式参数配...
1. 基本控制参数设置 1)设置位置控制模式 2)绝对值位置线性模...
不能访问光猫的的管理页面
光猫是现代家庭宽带网络的重要组成部分,它可以提供高速稳定的网络连接。但是,有时候我们会遇到不能访问光...
不一致的条件格式
要解决不一致的条件格式问题,可以按照以下步骤进行:确定条件格式的规则:首先,需要明确条件格式的规则是...
本地主机上的图像未显示
问题描述:在本地主机上显示图像时,图像未能正常显示。解决方法:以下是一些可能的解决方法,具体取决于问...
表格列调整大小出现问题
问题描述:表格列调整大小出现问题,无法正常调整列宽。解决方法:检查表格的布局方式是否正确。确保表格使...
表格中数据未显示
当表格中的数据未显示时,可能是由于以下几个原因导致的:HTML代码问题:检查表格的HTML代码是否正...
Android|无法访问或保存...
这个问题可能是由于权限设置不正确导致的。您需要在应用程序清单文件中添加以下代码来请求适当的权限:此外...
银河麒麟V10SP1高级服务器...
银河麒麟高级服务器操作系统简介: 银河麒麟高级服务器操作系统V10是针对企业级关键业务...
【NI Multisim 14...
目录 序言 一、工具栏 🍊1.“标准”工具栏 🍊 2.视图工具...